Posted on Leave a comment

Turning the Rotterdam Box

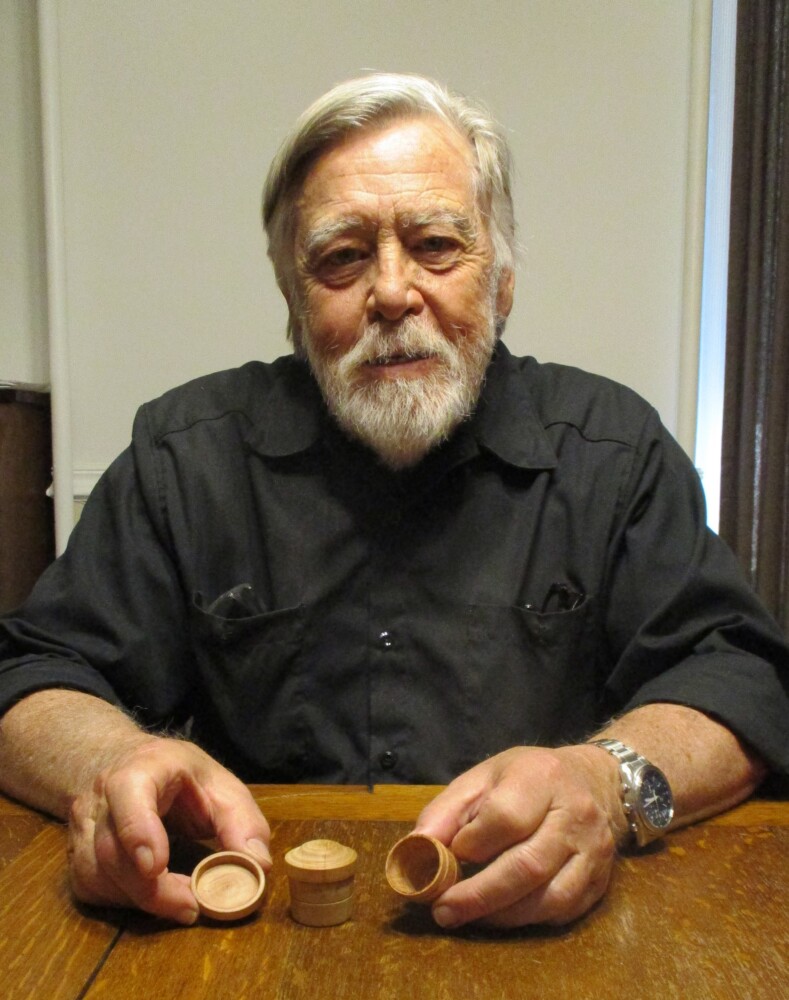
Our friend Chuck (Master Gryphon), a talented wood worker, has been working on making replicas of the turned wooden box in which the three Rotterdam brooches were found. He has shared a step by step description of his process.

The Rotterdam trio, as we call them, are three brooches dated to 1350-1400. They were excavated from the construction site of the Markthal in 2009-1010 and when they were found, they were all in a single wooden box, barely large enough to hold them. Images of the brooches and the remains of the box were published in Heilig en Profaan 3 (2012).

The kind folks at Archeologie Rotterdam (BOOR) provided better photos of the box (as well as images of the three brooches). They say that the wooden box is 2.7 cm high and approximately 3.0 cm in diameter.
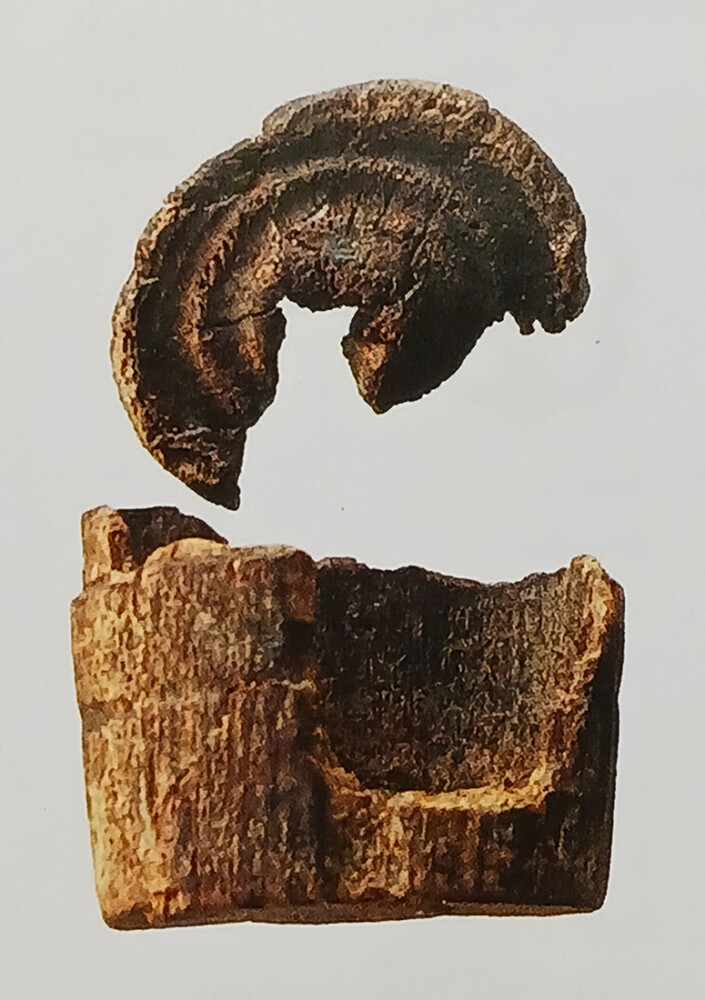
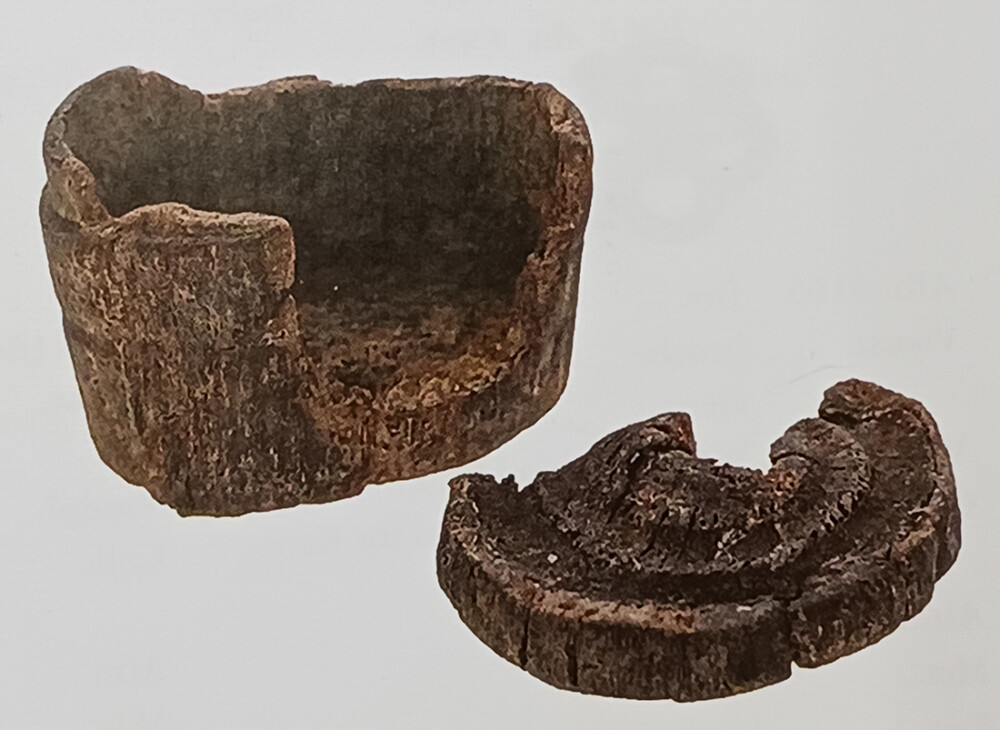
Chuck and Mac studied the photos, discussed where the measurements were taken, and talked about what the box might have looked like when it was complete. Mac made a sketch showing the results of their analysis.
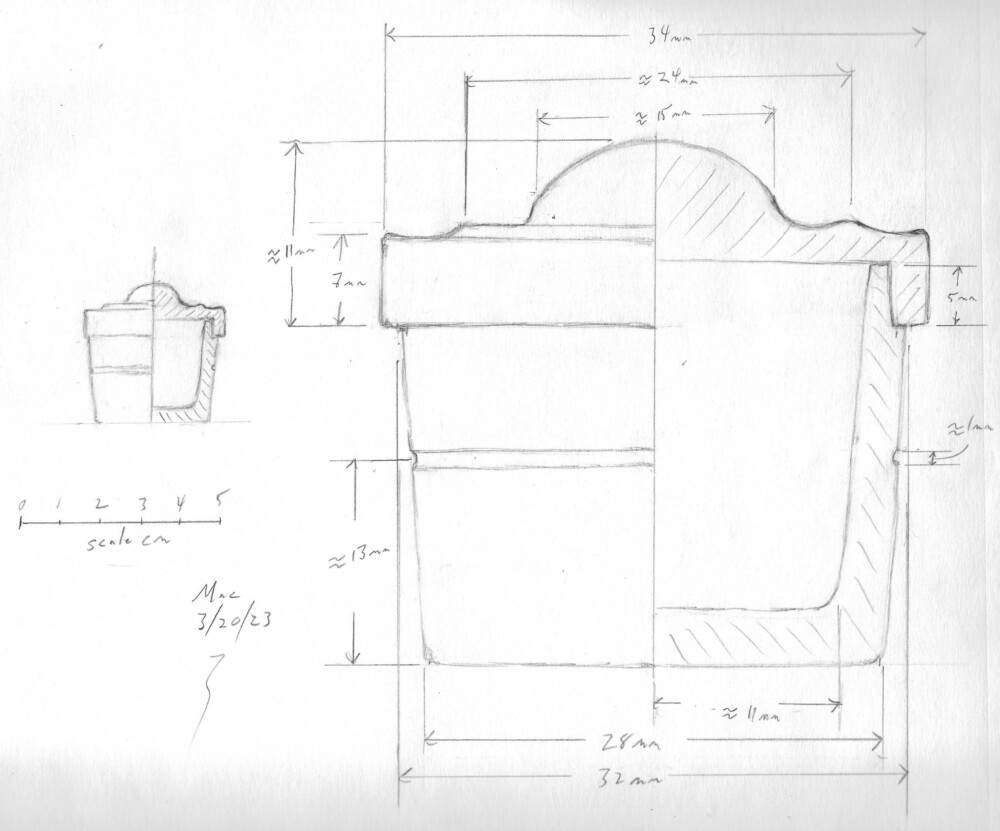
After a series of experiments and test pieces, Chuck produced not only our box (and some additional boxes for friends), but also photos showing his procedure. He has been kind enough to share these:
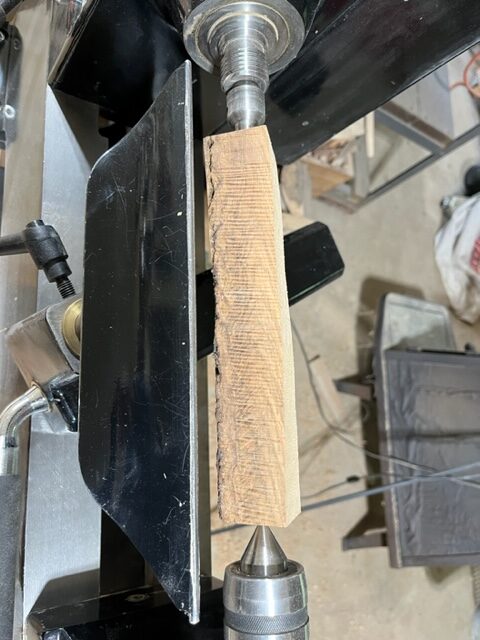
Select a square piece of close grained hardwood at least 1.5” square x 6” long. Mount between centers on the lathe.
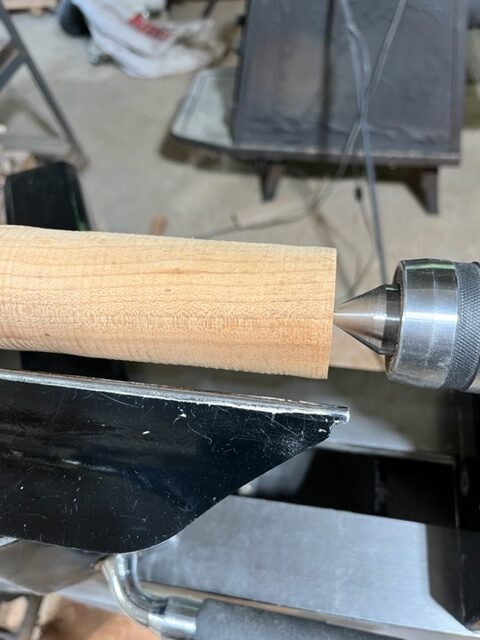
Turn round to just less than 1.5” diameter.
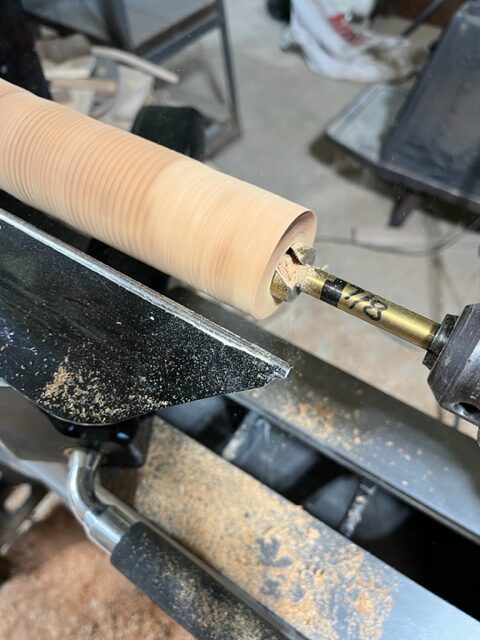
Use a 7/8” Forstner bit and drill in 21mm. Can also use bowl gouge or scraper instead of drill.
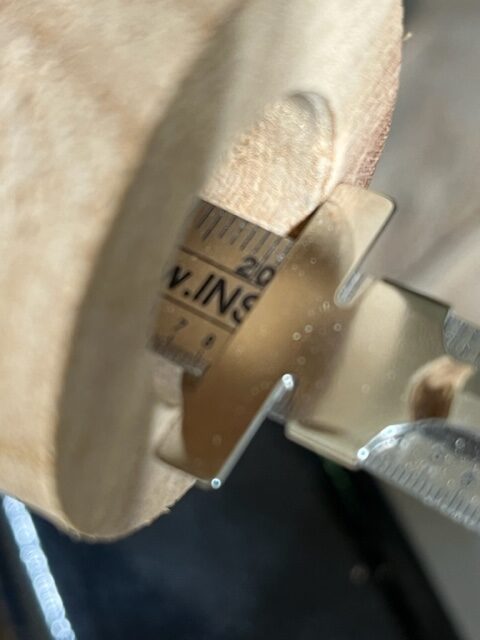
Check the depth for 21mm.
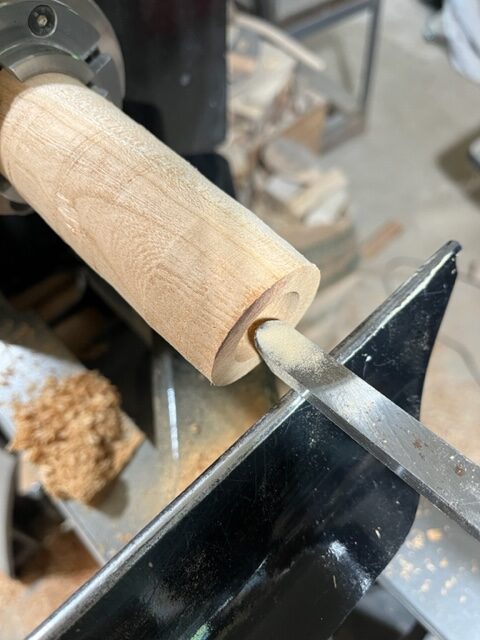
Use a round nose scraper (or bowl gouge) to shape the inside to the proper dimensions and taper (26mm at top and 22mm at bottom).
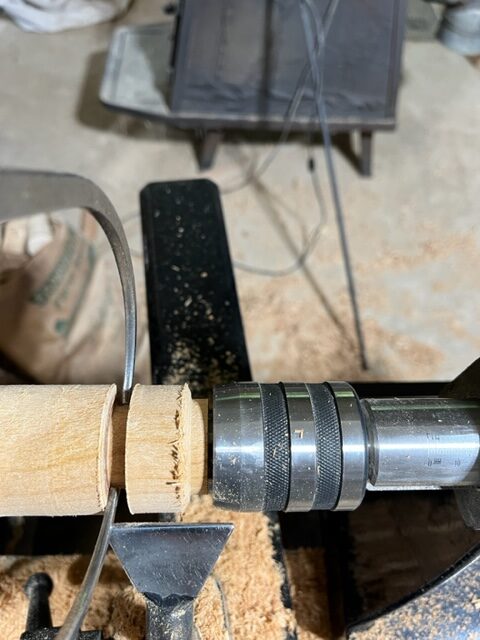
Place live center in opening.
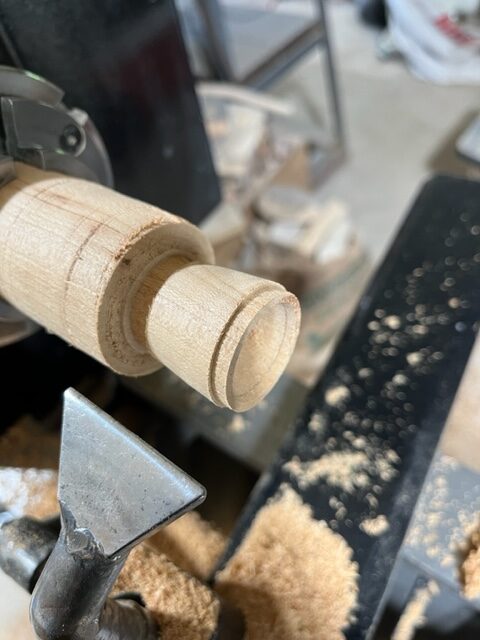
Use spindle gouge to turn the outside to the proper dimensions, taper, and add lip for lid.
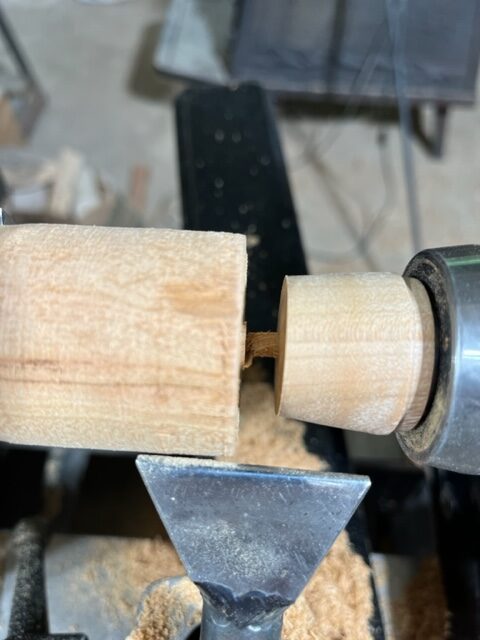
Use parting tool to cut to length leaving it still attached. Sand the inside and outside and finish parting from lathe.
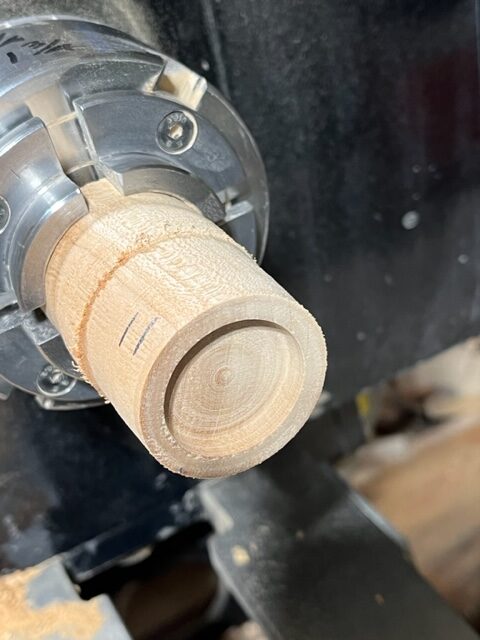
Mark the remaining piece on the lathe for the top dimensions (7mm and 11mm) and turn the inside to match the lip on the bottom.
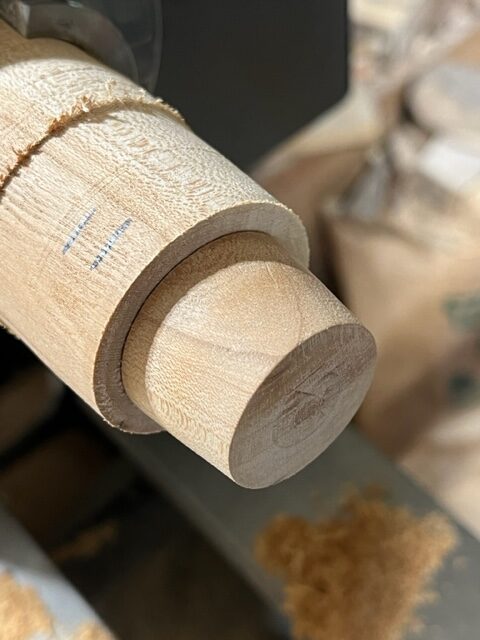
Insert the bottom into the top recess and check for tight fit.
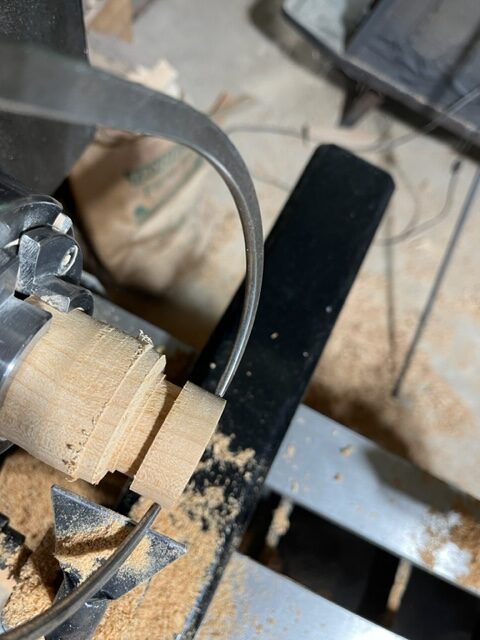
Turn the top diameter to 34mm diameter and 11mm long.
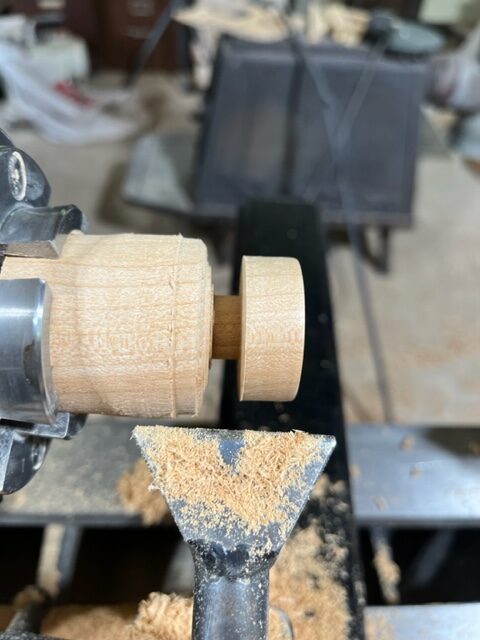
Sand and part the top from the lathe.
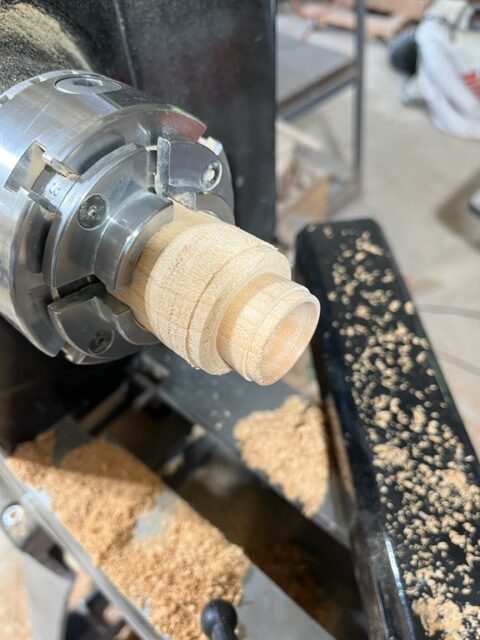
Turn a recess into the remaining piece on the lathe to accept the bottom and act as a jam chuck. Check that the bottom is centered.
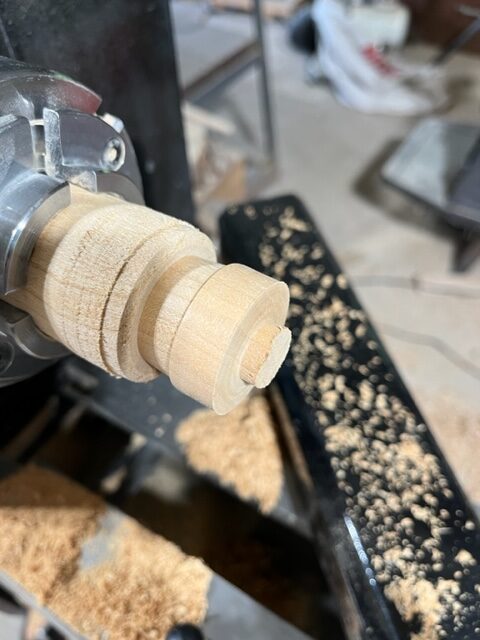
Mount the top onto the bottom.
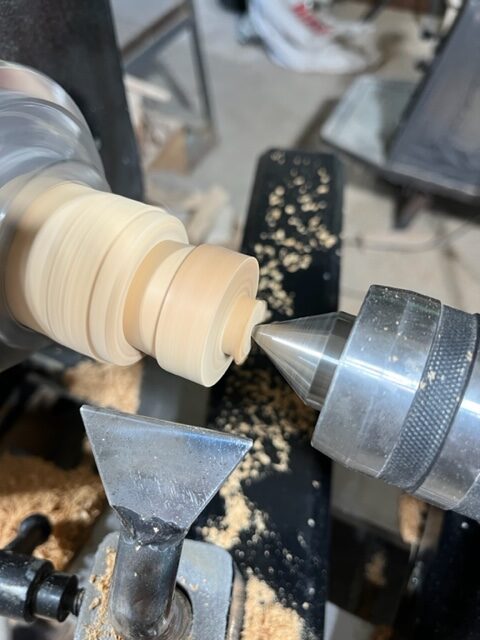
Adjust the tail stock to lightly support the top mounted to the base.
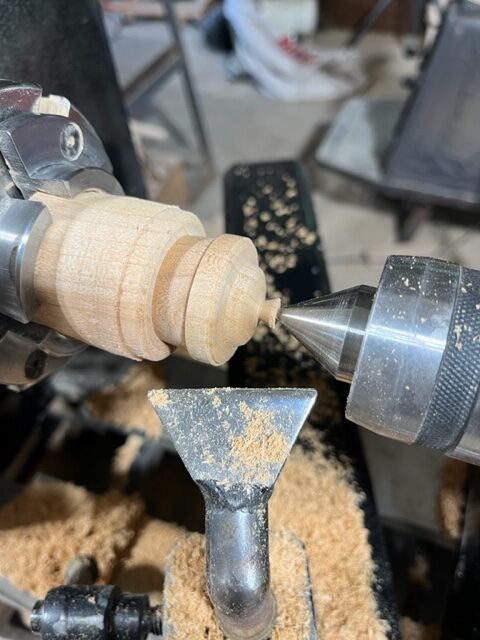
Finish turning the outside of the top. Remove the small stud and sand.
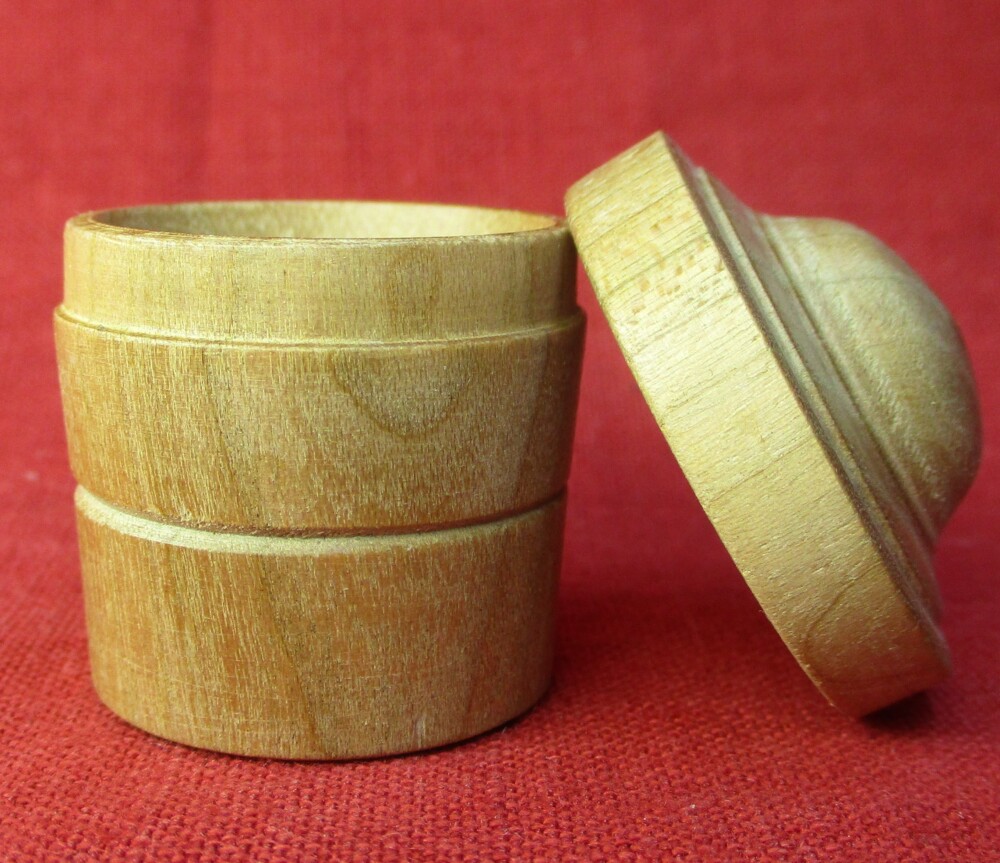
The finished box.
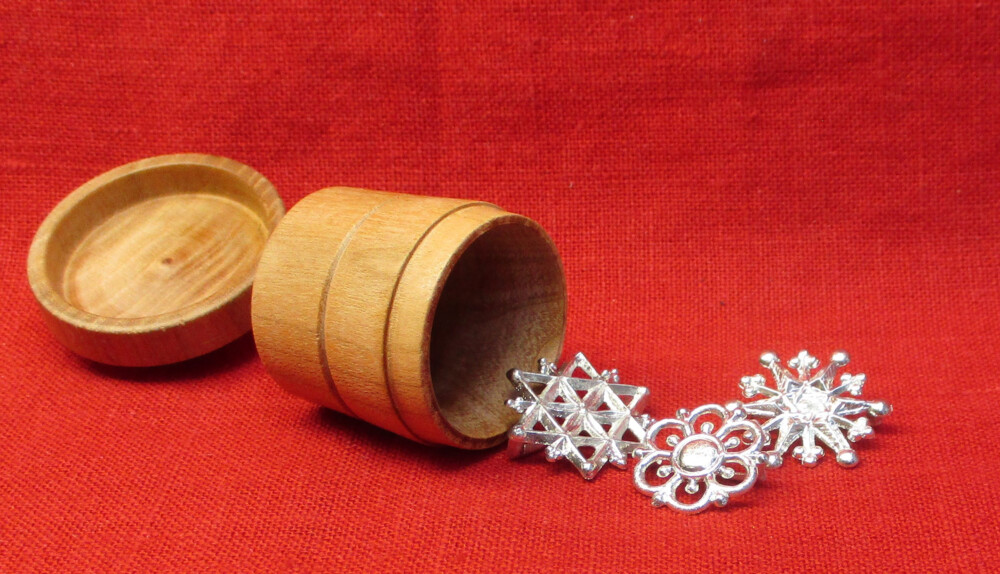
See our replicas of the brooches that were found in the original box.

Interested in seeing more boxes, both extant examples and in art? Mac has a Pinterest page on them.

Posted on Leave a comment

Parodies and Perversions

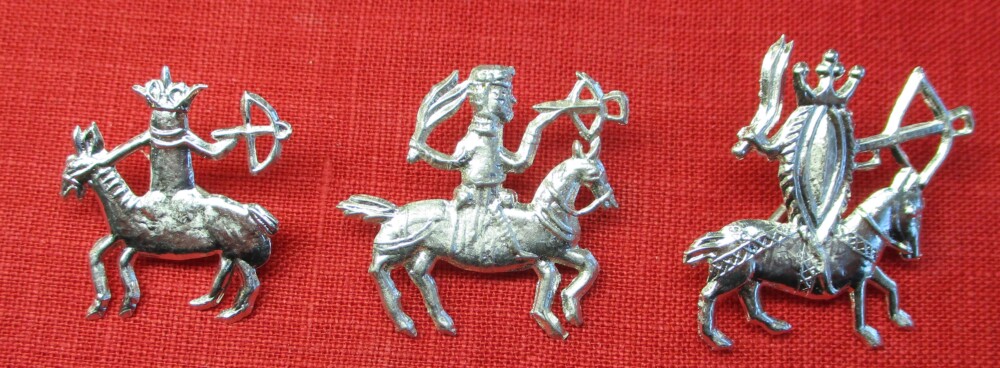
Three similar figures on horseback carrying crossbows. The riders are a penis, a man, and a vulva

We are accustomed to seeing reworked visual material in our day to day lives – American flags with the fields in various colors or with additional images overlaying the official design; blond “housewives” weeping, shouting, and pointing paired up with irritated cats; folks making improvised costumes to evoke famous paintings. It turns out medieval people were into it also – and some of those jokes ended up as obscene pewter dress accessories.

We are especially delighted by the naughty items that can be mistaken for their clean counterparts unless you are close enough to see the details – and of course, we like to make them. And bear in in mind that in a world without vision correction, many people would have to be very close to distinguish between these pairs.

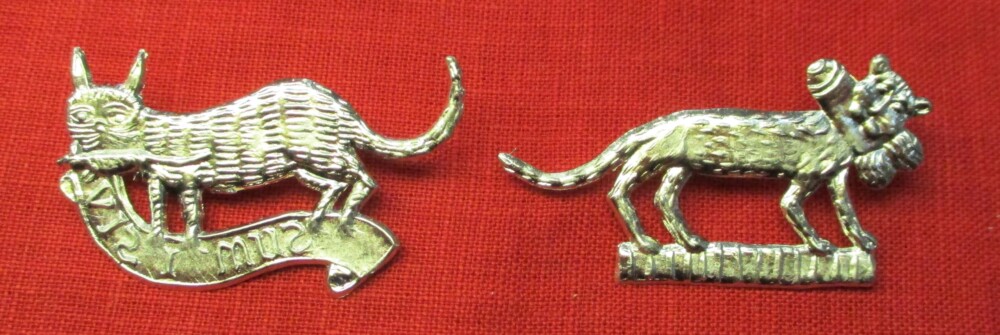
Two similar depictions of a cat carrying something in its mouth - in one case a mouse; in the other a penis.

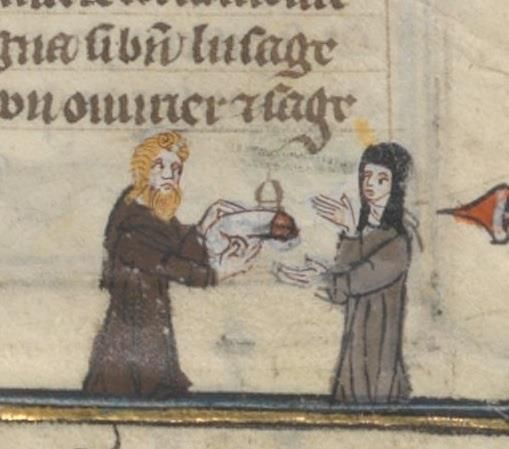
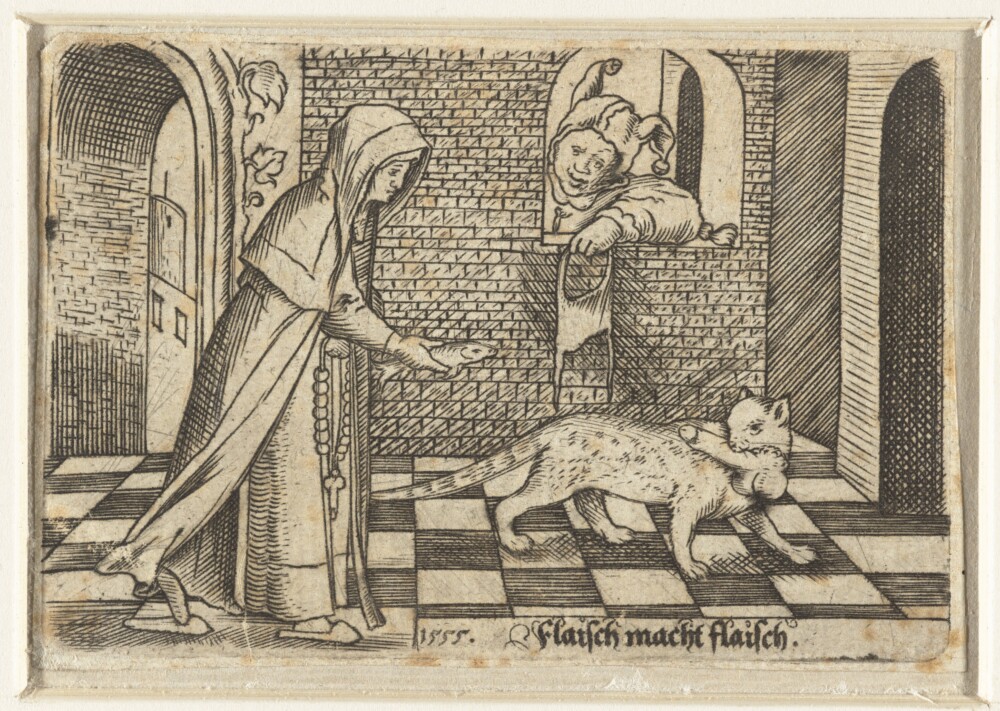
Our most popular pair includes the Good Kitty and the Bad Kitty. The good kitty has caught a mouse. The bad kitty has definitely gotten hold of something it should not have. Of course, this is not quite as strange then as it would be now – a number of medieval and early modern images show independent penises flocking in trees like birds, being offered to prospective partners, flying through the air, or being carried by a cat.

So although it might be shocking to find that your companion’s brooch did not depict the ordinary cat you expected, at least the entire idea of a detached erect penis would not necessarily disturb you.

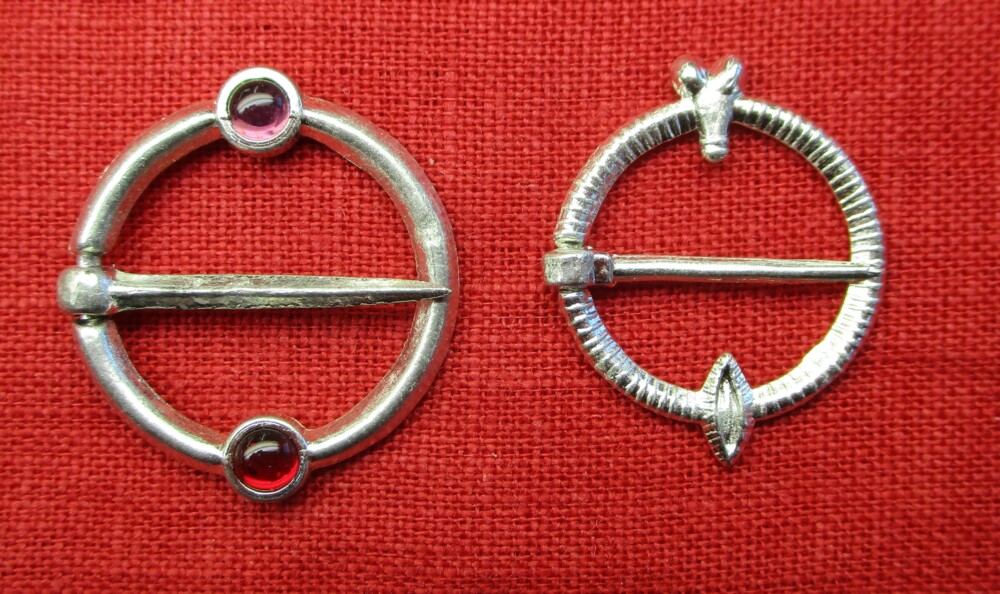
Some types of brooches are so ubiquitous that it would be easy to conceal the joke. Ring brooches are the most popular brooch form of the High Middle Ages, and they come in all sizes from humongous to quite petite. The small Naughty Ring Brooch, with its delicate little penis and vulva, is indistinguishable from dozens of contemporary round ring brooches from more than a yard/meter or so away. Similarly, the Pussy Ring is extremely discreet – designed just like other pewter rings – or rings made in other metals – with a central setting surrounded by four tiny “pearls”.

Three similar pendant purses. The first is an openwork drawstring purse and contains a pretend coin. The second looks like a closed frame purse on one side; the other side reveals it contains three penises. The third is a small, closed frame purse.

Purse brooches and pendants are also common, and may well have been thought of as a sort of good luck piece, guaranteeing that your real purse was never empty. We have three purse pendants, two respectable ones and then the Full Purse, which is doubly deceptive: it is utterly inoffensive on one side, but the wearer can flip it over to reveal that it contains three more of those wandering penises.

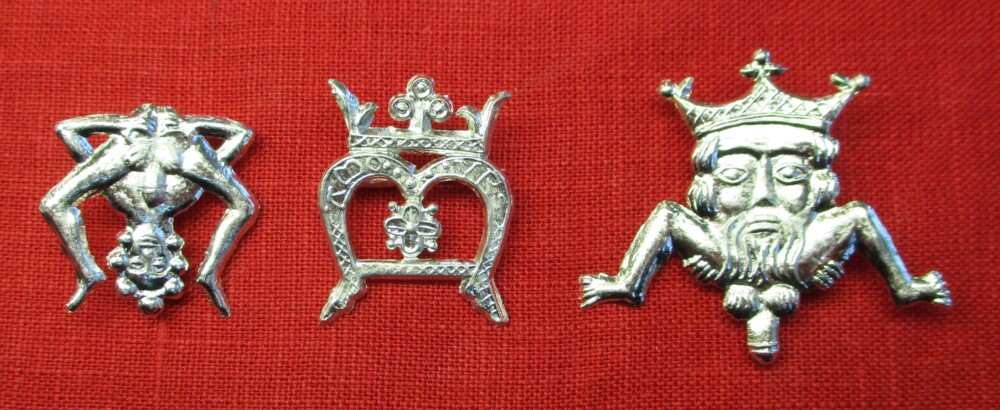
Three brooches with an over M shape. The first is a nude man leaning over to display his anus and penis. The second is a letter M with a crowns and a flower. The third is a grotesque male figure with crowned head, spread legs, and pendant penis.

M-shaped brooches are frequently found, in both precious and base metals. The initial probably usually refers to the Virgin Mary, although it may have other meanings, including Minne – courtly or romantic love. The brooch in the middle of the triplet set is a characteristic example of one of these harmless brooches – and it says AMOVRS, so we can be sure it is a love token. The acrobatic Mr. M has a nearly identical overall shape, while the KingDing shares the crown but not the exact outline.

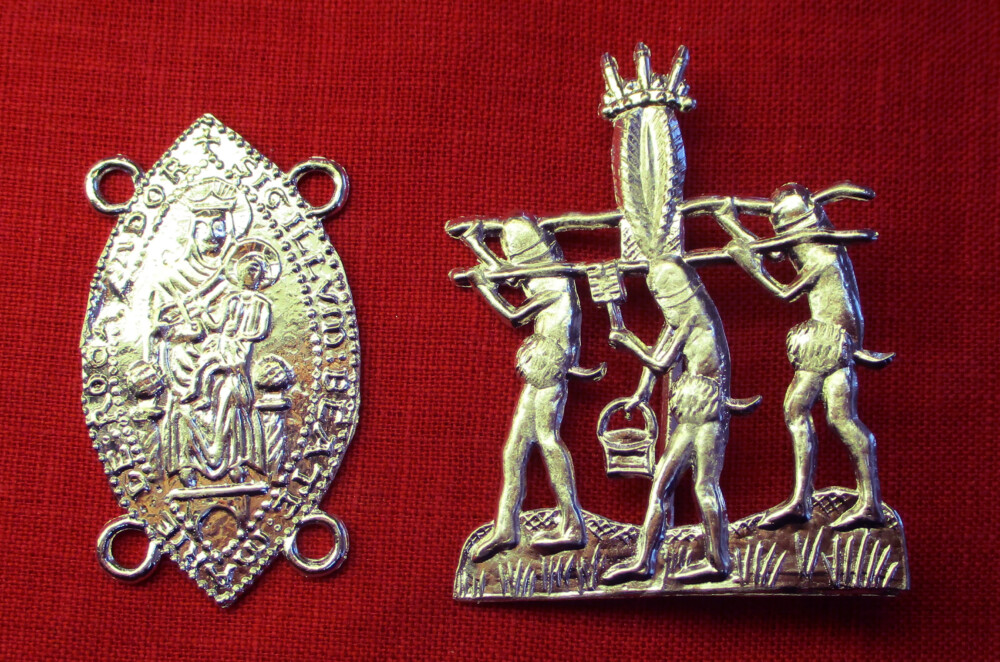
A relatively small number of naughty items present visual puns on religious motifs – although the Regina Terris brooch obviously displays a vulva as a religious icon carried in a procession, complete with a penis priest using an aspergillum to fling “holy water” around. The brooch we call Our Lady of Baloney is a brutally obscene, perhaps politically motivated, parody of images of Our Lady of Boulogne-sur-Mer.

Three similar pendant combs with differing decoration in the middle between the teeth: the first with a scene of heterosexual intercourse; the second with an openwork decorative design; the third with a number of penises arranged along a ribbon

Everyday items are more likely to be depicted in both innocent and naughty versions than are divine persons. Here is a group of three combs – one ordinary and two with tasteless decoration. The incredibly cute Wee Willies Comb was so discreet that the Museum of London listed this as a pilgrim sign for St. Blaise for years before someone finally noticed the sinuous little line of penises.

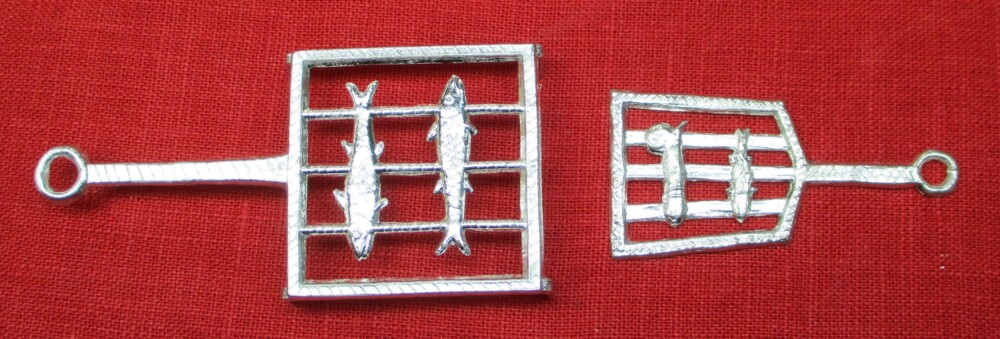
Two similar gridirons - one with two fish; the other with a fish and a penis.

And finally, a pair of gridirons, the less seemly of which takes us back to the penis/fish thing we saw in that 16th-century print with the cat. The other is part of a child’s toy kitchen.

Check out our continuously updated page of Parodies and Perversions, where you can find all the twin and triplet sets we have produced, and get a little discount on a set if you want to keep your granny happy while amazing your friends.

Posted on Leave a comment

On making things meant to be identical quite similar

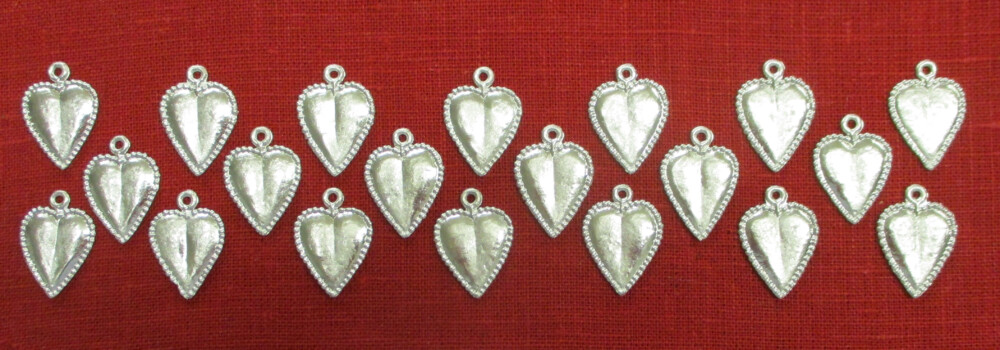
An array of heart spangles on a red background

We make molds for a lot of medieval gewgaws – roughly 525 items. Many of the smaller goods – spangles, buttons, chaplet decorations, belt mounts, clothing fasteners – come out of multi-cavity molds that cast three or more copies of the item.
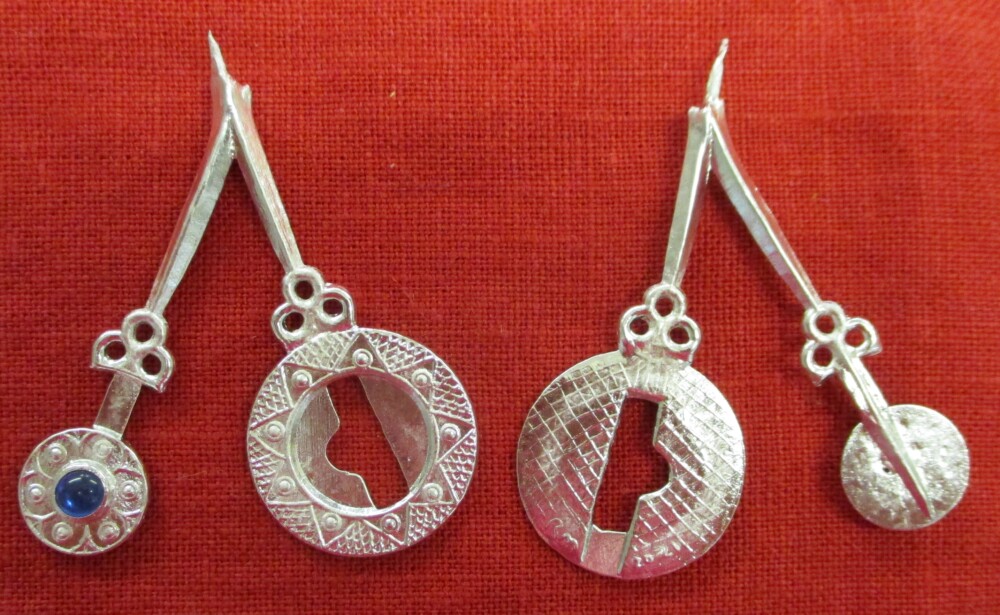
It is important that the resulting castings are indistinguishable from one another except on very close inspection. We also want the mold to cast easily and completely (or nearly completely) every time. For this to happen, the mold cavities must be very similar, and they have to be laid out so that the metal fills each of them the same way. We try to choose the best mold design from a number of authentic layouts.

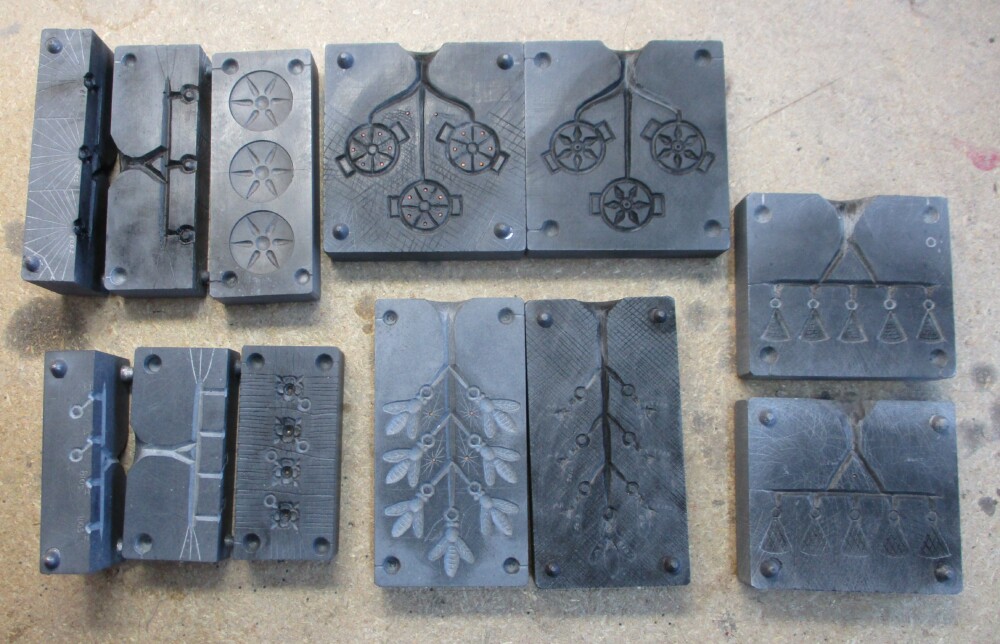
Multiple cavity molds: button, circlet decoration, spangle with stone, bee spangle, and triangular spangle

The two molds on the left are three part molds – the one to accommodate the button loop and the other so the stones can lie flat in the spangle mold while the metal pours in. The openwork star chaplet decoration mold and the bee spangle mold have cavities that branch off a central sprue. That middle sprue narrows as it descends and the lower feeds are narrower/thinner than the upper ones to balance the greater pressure to the lower parts of the mold. The mold for the triangular spangles equalizes the pressure in a different way, by arranging the cavities horizontally and splitting the main sprue to even out the flow and amount of metal to the various cavities.

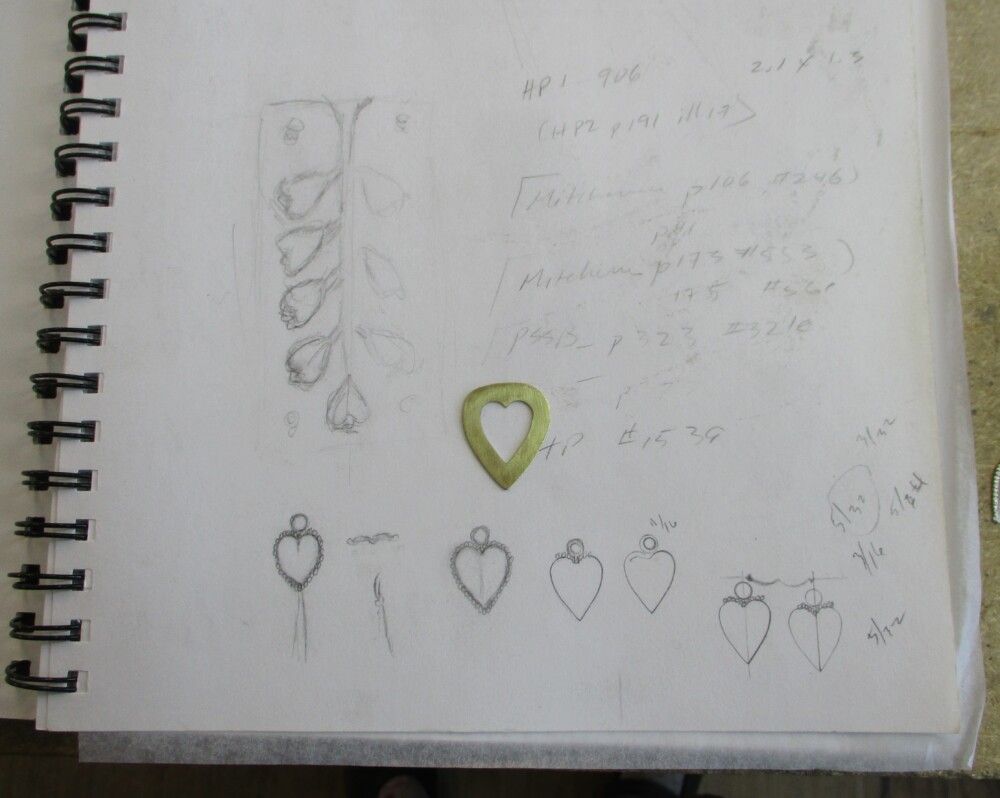
Notebook with sketches for heart spangle and mold with brass template.

This notebook page shows a layout we considered for the heart spangles, as well as some late sketches of the form the heart would take. (Preliminary sketches were on another page.) When we make round things we use a compass to lay out the pieces. But for items like the bees or the triangles – and the hearts – we employ templates to trace the shapes of the cavities. We have used cardboard and thin template plastic before; for the heart spangle Mac made a brass template to my final design. This let me trace the exact shape with a sharp needle on the stone – and also to trace the heart in pencil in my notebook to experiment with the beading, the loop, and so on.

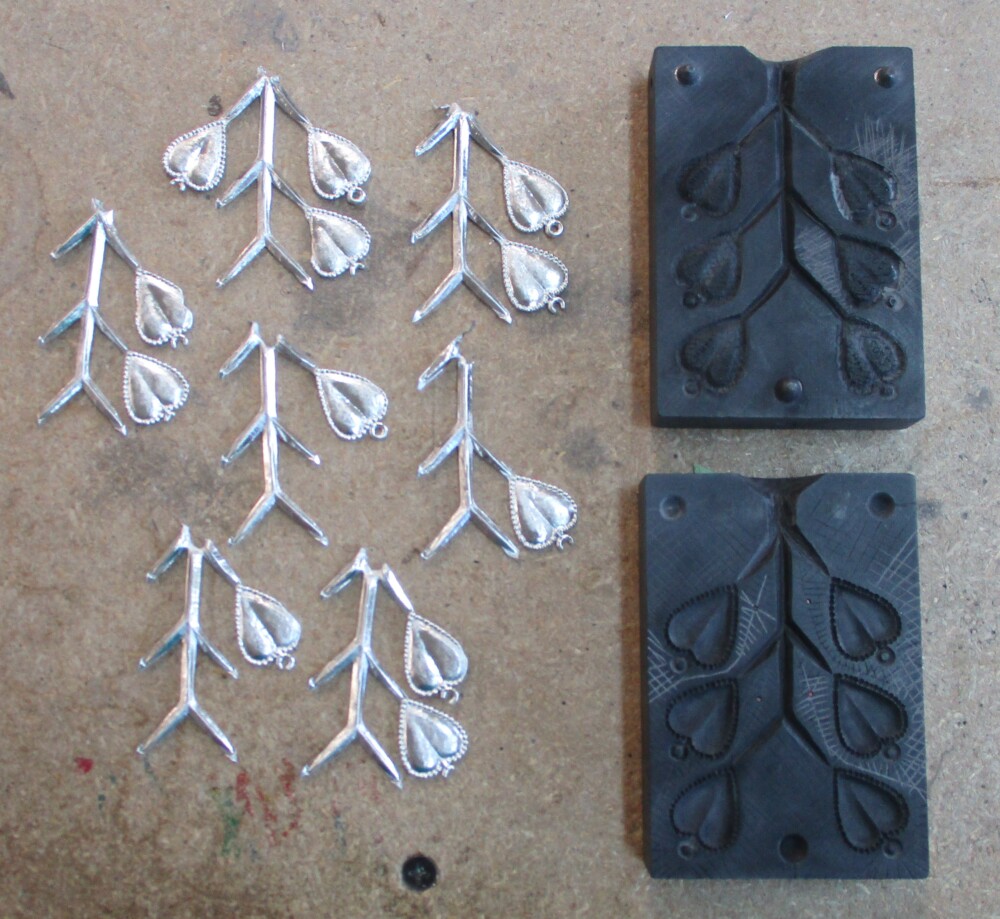
Castings of heart spangle mold with complete hearts cut off and incomplete castings left to compare and correct.

Hours of careful work into the project, I was getting many of the cavities to fill, most of the way, most of the time. I put my initials and the date on the back of each spangle, so that any examples that cast fully could be cut off, cleaned up, and sold. At this stage we keep every casting for examination. Clipping off the good examples, we lay out what is left to show where the repeating problems are. In the shot above we see that of the six cavities there is still trouble with the upper two hearts on the right. The loops are not casting, and upper heart is not filling to the edge. I corrected only the places that were not working, leaving the rest of the mold untouched. The lighter areas of the mold show where I extended and deepened the back under the beading where it was not casting, deepened the loops, and reinforced the venting both front and back.

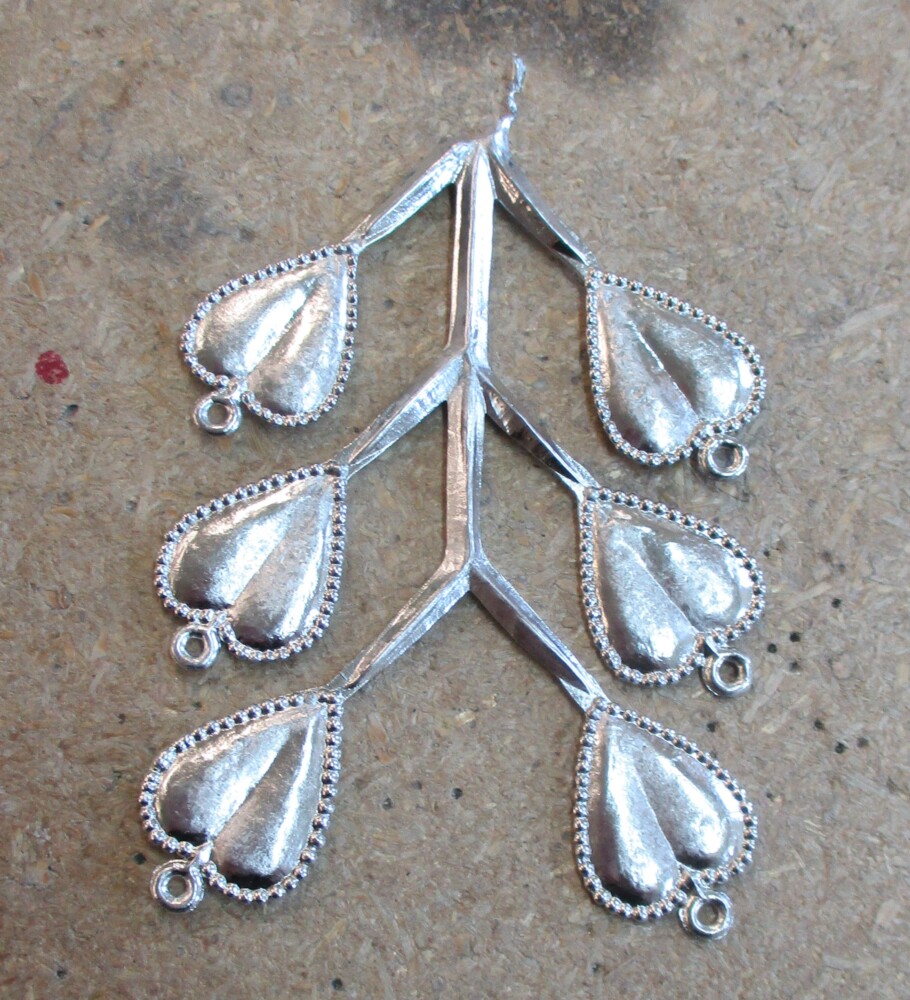
Complete cast of six spangles on sprue for heart spangle

By the time I filled the stock box, the mold still was not working perfectly every time, so the next time I cast I will continue tweaking the cavities, the sprues, and the venting. I’m almost there.

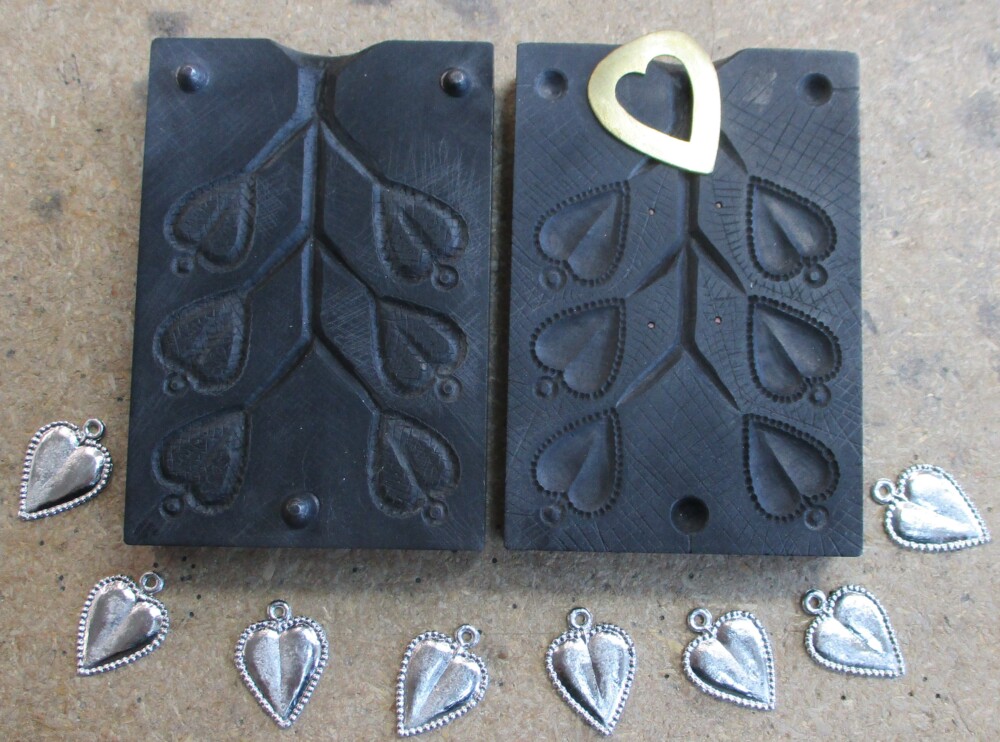
Mold for heart spangle with brass template and castings

The hearts themselves are also not perfectly identical – if you took a handful of them you could play “Spot the Difference” and sort them by mold cavity. But because I took care in design and layout, and worked as meticulously as I could, they are similar enough.

Posted on

Remaking an unsatisfactory mold

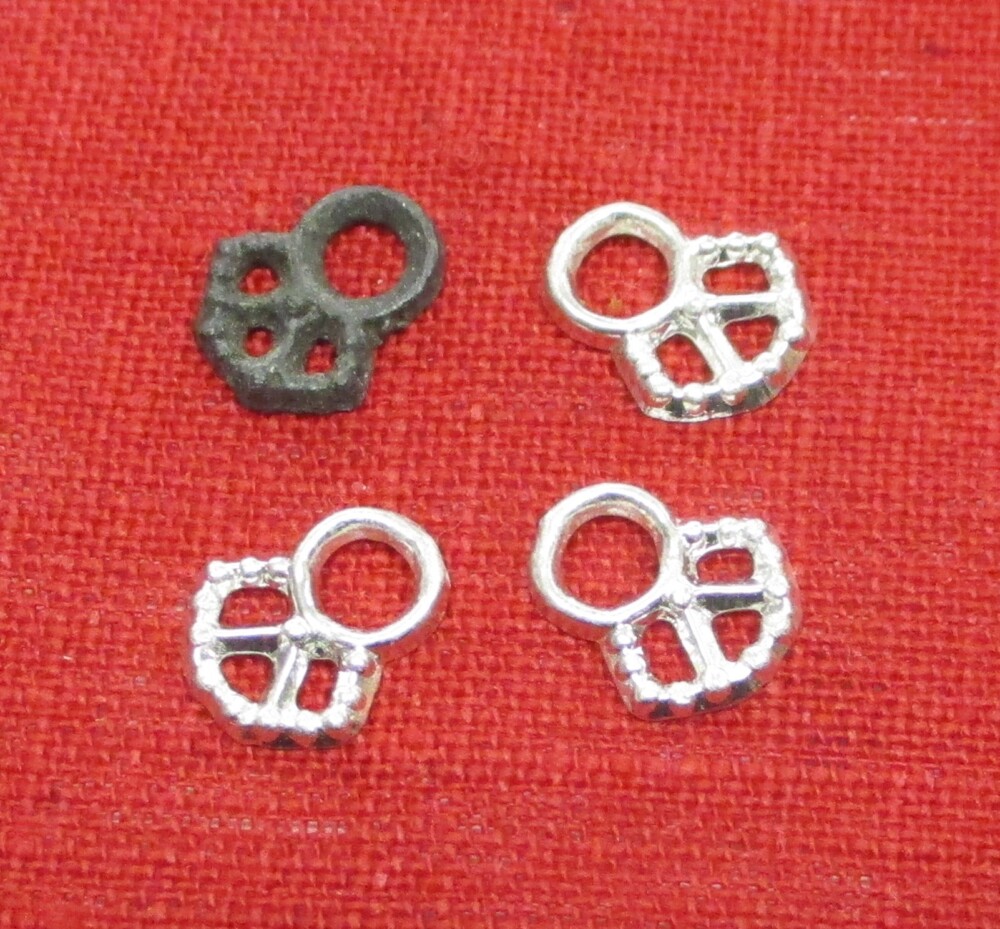
We used to offer a low-profile eyelet with three sewing holes and a pearled surface. It was copied after an original lacing eyelet in our collection. The eyelet was attractive and sturdy but the mold had problems.

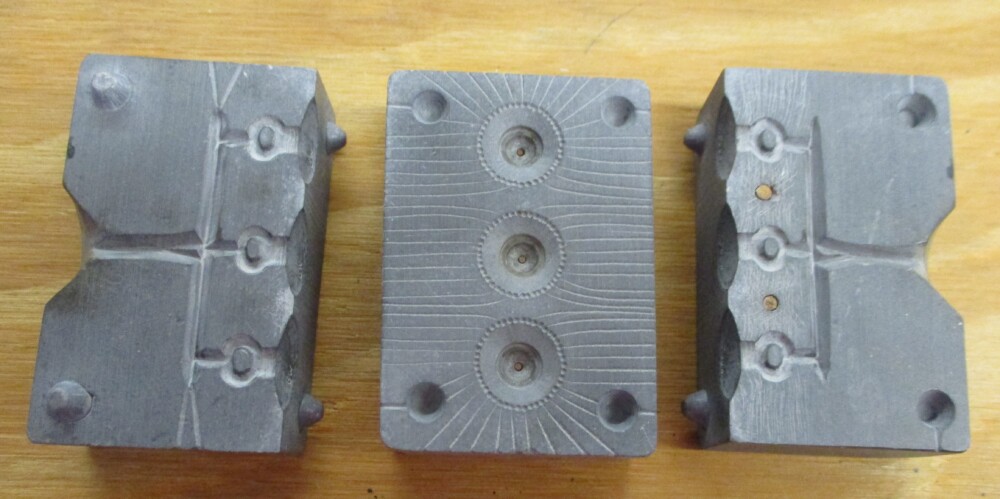
There are several ways to arrange the cavities in a gang mold – and all have their uses. Marianne, who made the first mold in 2006, used a vertical sprue with individual channels branching out for each eyelet. The channels travel towards the outside of the mold, then drop vertically with the eyelet cavities all descending at the same angle.

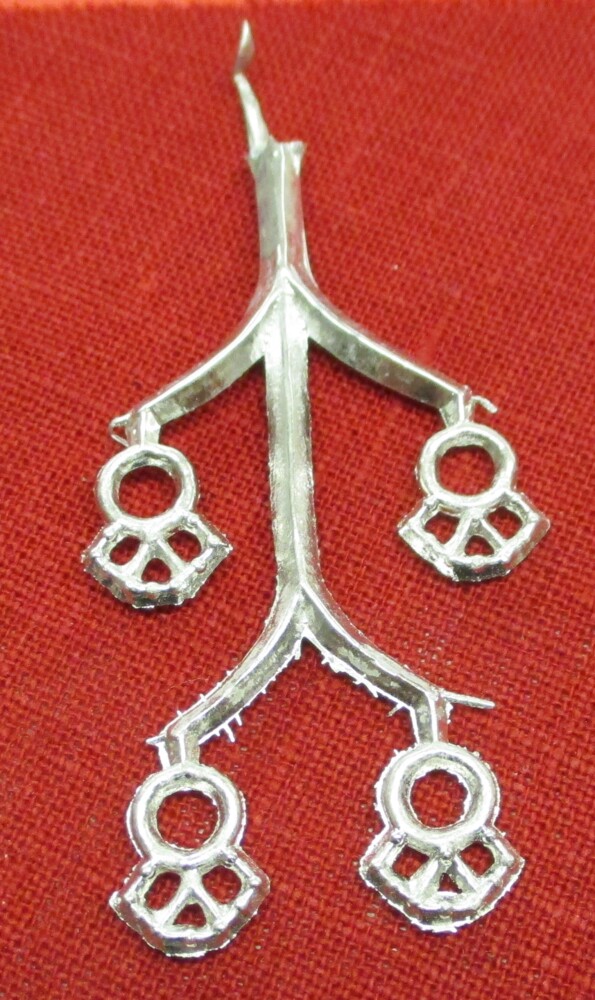
If a gang mold is properly made all the cavities fill perfectly every time. If it is not, some cavities do not fill or fill incompletely. Meanwhile, other cavities flash (have “fins” of unwanted metal that sneaks between the mold parts) and have to be cleaned up after casting. The problem with arranging the cavities vertically in a gravity-fed mold is that the lower cavities cast completely at a lower temperature (of mold and/or metal) than the upper ones – or more consistently – because the pressure is greater at the bottom. Usually you can adjust the spruing and gates so that most of the castings are satisfactory most of the time.
Old filigree eyelets mold

This mold shows one way to try solve that problem – the upper branching channels are thicker than the lower ones, feeding more, hotter, metal to the higher cavities. Making the mold was a prolonged struggle, with repeated unsuccessful efforts to balance the pressure to each casting. It is also a tightly fitted mold and needed extensive venting. We were in the midst of a period of exploration of venting technologies, and Marianne vented it – too aggressively – with a grid of closely spaced vents across the entire back mold valve. The result was that, even after all the fuss, castings usually had fewer than four complete eyelets and many of the complete eyelets were flashy.

Flashy casting from the old filigree eyelet mold

We continued to use the mold for a number of years, fiddling with metal temperature as we poured to try to control the flash; cleaning the flash off rapidly while cutting the eyelets from the sprue; throwing a lot of partial casts back into the pot, and cursing. We eventually introduced our pointy eyelets and let the filigree eyelets drop out of production.

Mold for the pointy eyelets


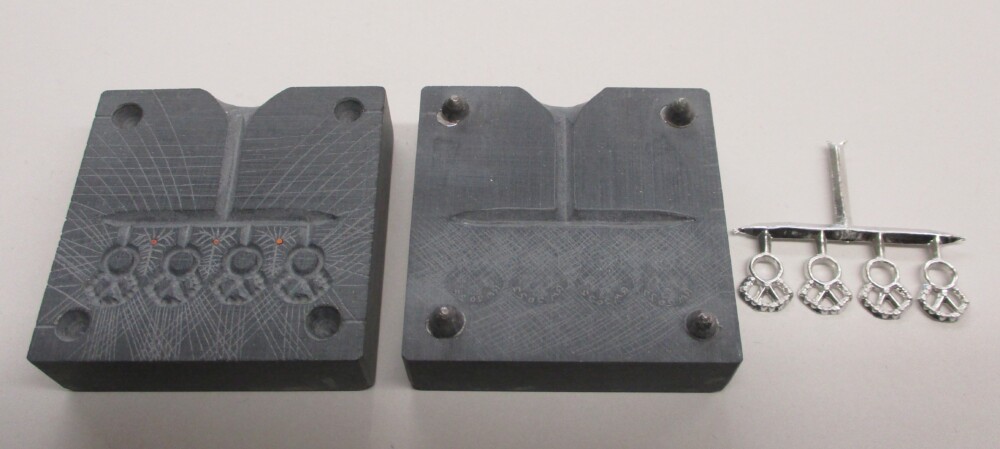
The pointy eyelet mold is laid out on a different plan, with one sprue descending to a horizontal runner – and it worked well from the beginning. This arrangement equalizes the pressure to each cavity better, although you have to tweak the thickness of the runner to optimize it. This sort of mold is also sensitive to whether it is level when the metal is introduced, as a tilted mold may give you flashy castings at the lower end of the runner and incomplete ones at the higher end.

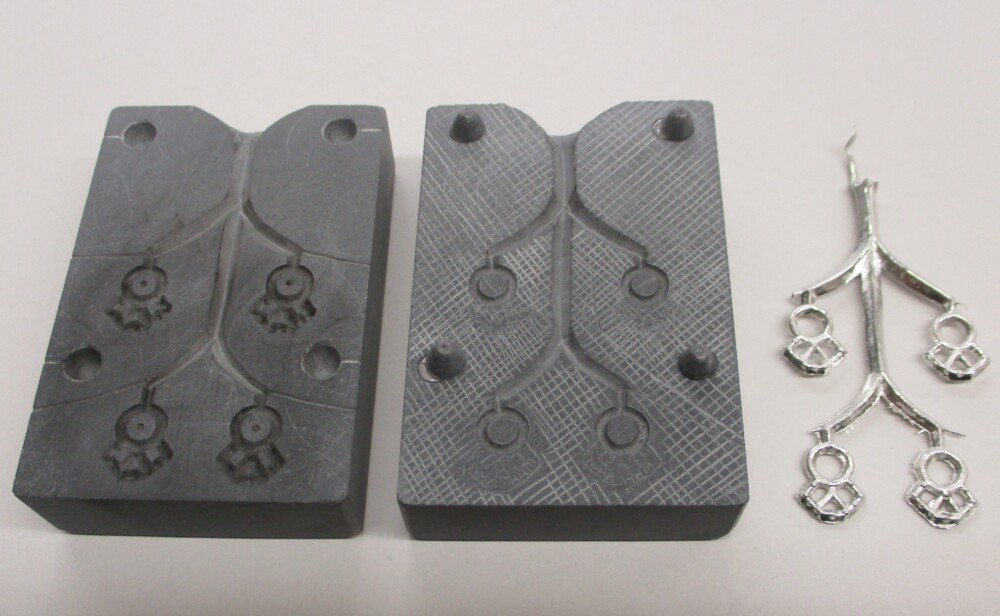
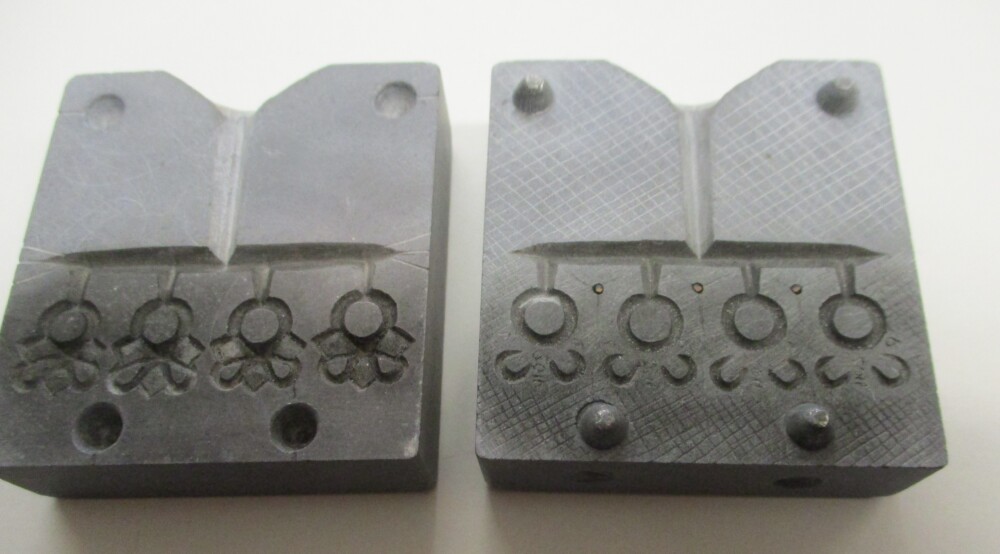
New filigree eyelets mold

This week Mac remade the filigree eyelet mold on the same pattern as the pointy one. The new mold is also vented very thoroughly – those are vents straight through the stone (filled with copper wire) between each of the cavities – but more expertly. We know more than we did 16 years ago, thank goodness.

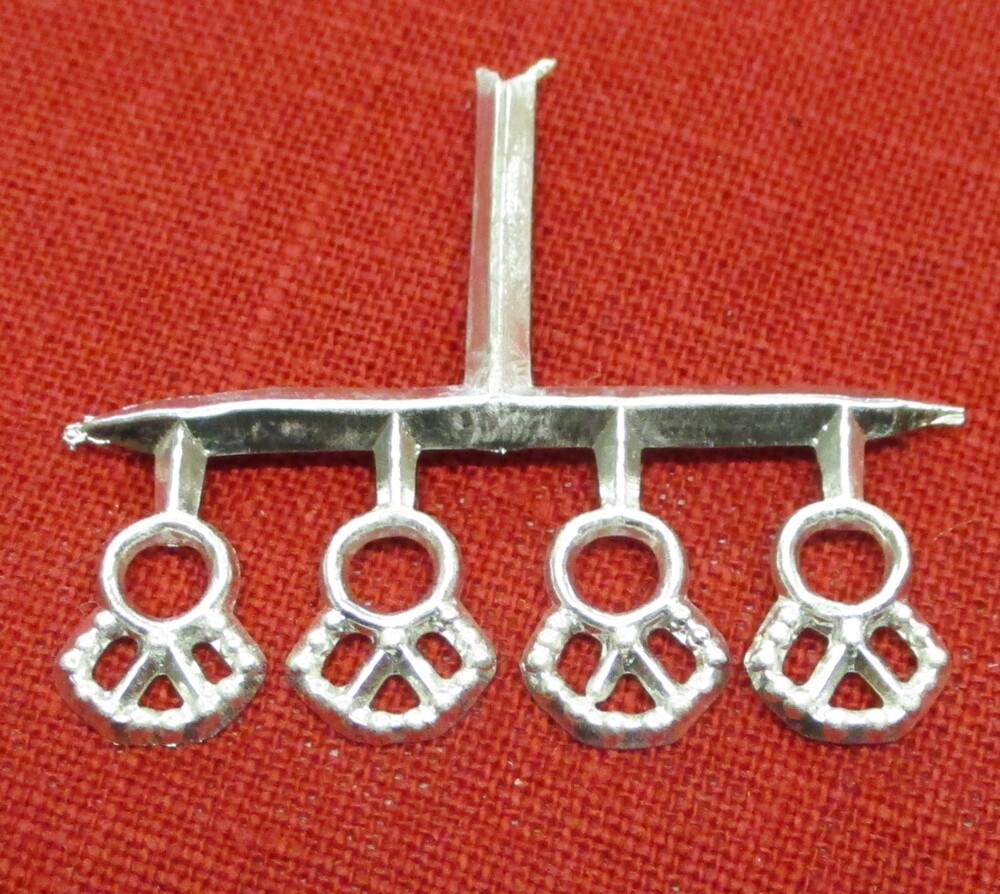
Clean casting from the new filigree eyelet mold

With the horizontal runner this mold consistently casts four perfect eyelets every time. We are offering this nice little lacing eyelet again.

Filigree lacing eyelets with original examplar
Posted on Leave a comment

A surprising mold from Magdeburg

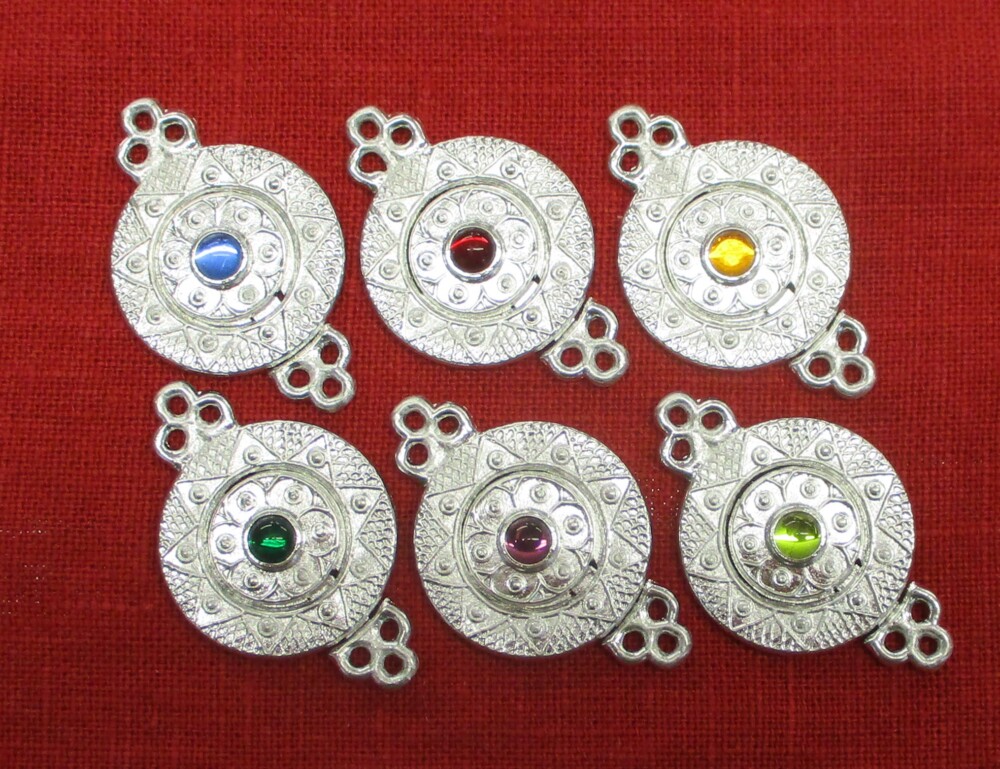
Large interlocking clasps - all six colors

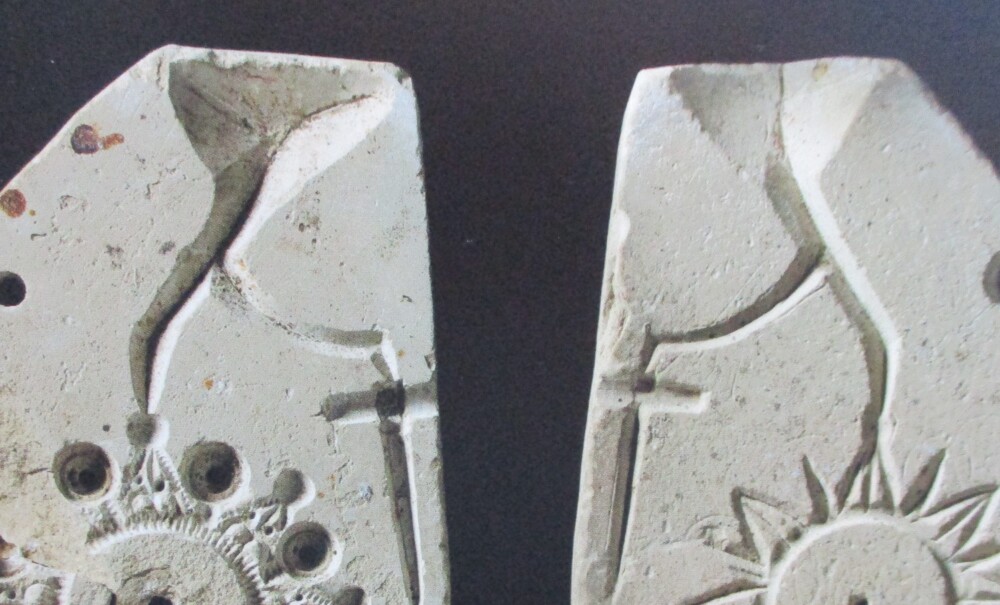
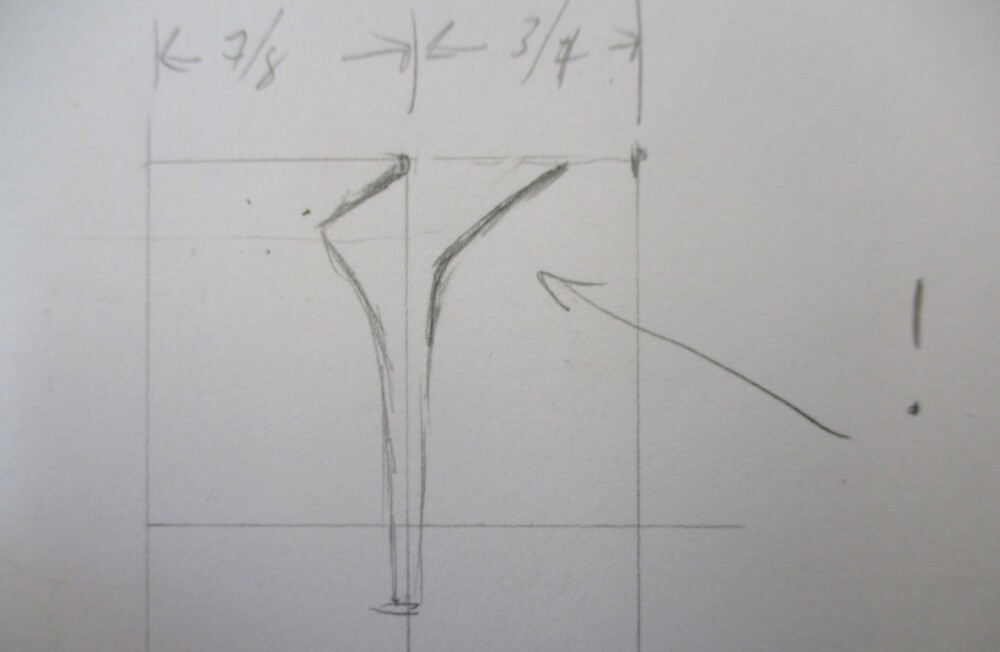
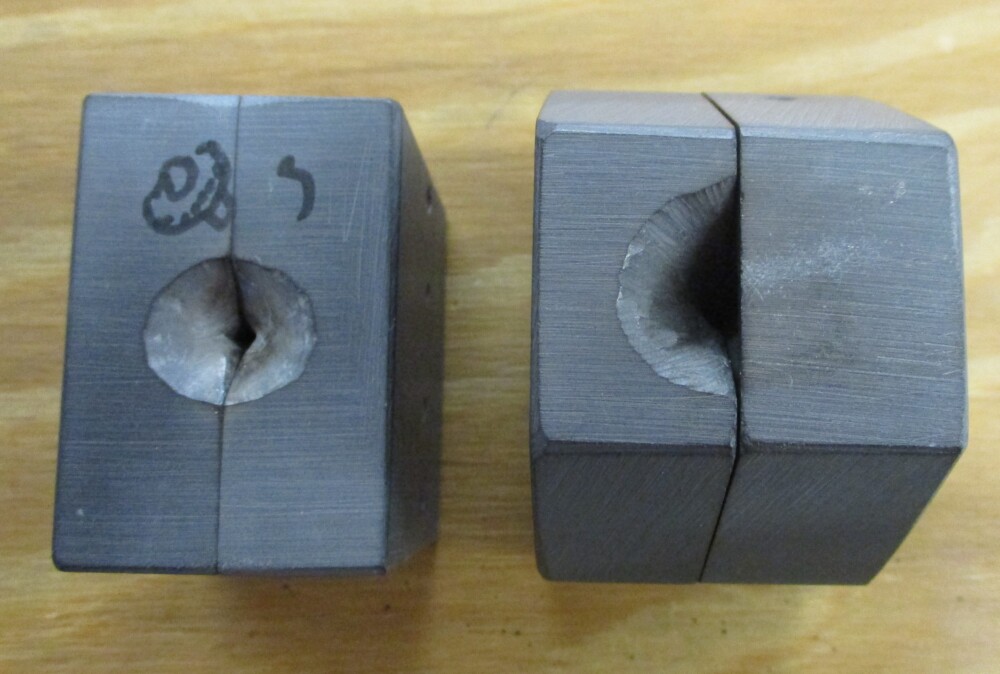
During our greedy, obsessive, first read-through of Daniel Berger’s magisterial book on the hundreds of 13th-century molds from Magdeburg* we noticed a number of molds where the gate (pouring basin) in one of the two mold pieces was closed off by a sort of dam of stone. On the left below, a detail of a dammed-gate mold from Magdeburg. On the right, a sketch of a cross-section through a two-part mold, showing the shapes of the pouring basin in the two halves.

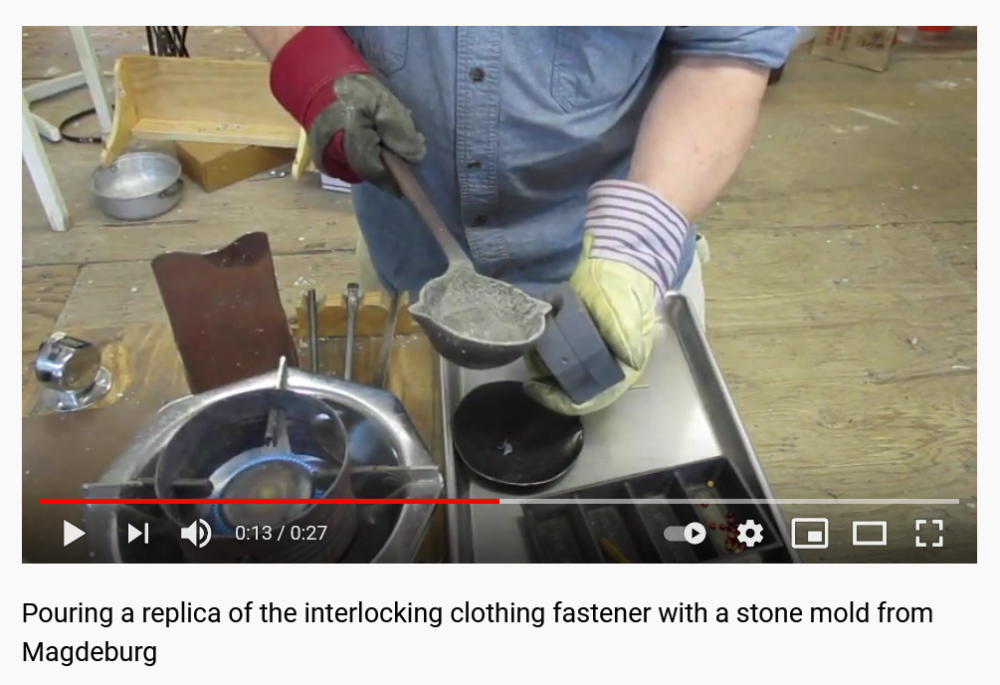
By the second read-through we had realized that of the nine complete molds with restricted pouring basins, all also had one or more hollowed out cavities for cast-in stones. (One mold was broken and there is no way to know what was in the broken part). We have always poured molds with glass stones in 3-part molds and carefully upright, so that gravity holds the stone level while the metal washes around it (3-part mold for buttons with glass stones below, left). But except for 3-part ring molds, the pewterers in Magdeburg seem to have poured items with stones in 2-part molds – at enough of an angle to keep the stone in place, and with a dam across the lower gate to keep the metal from sloshing out. On the right, below, a view of the gates/pouring basins of the 3-part button mold and the 2-part clasp mold.

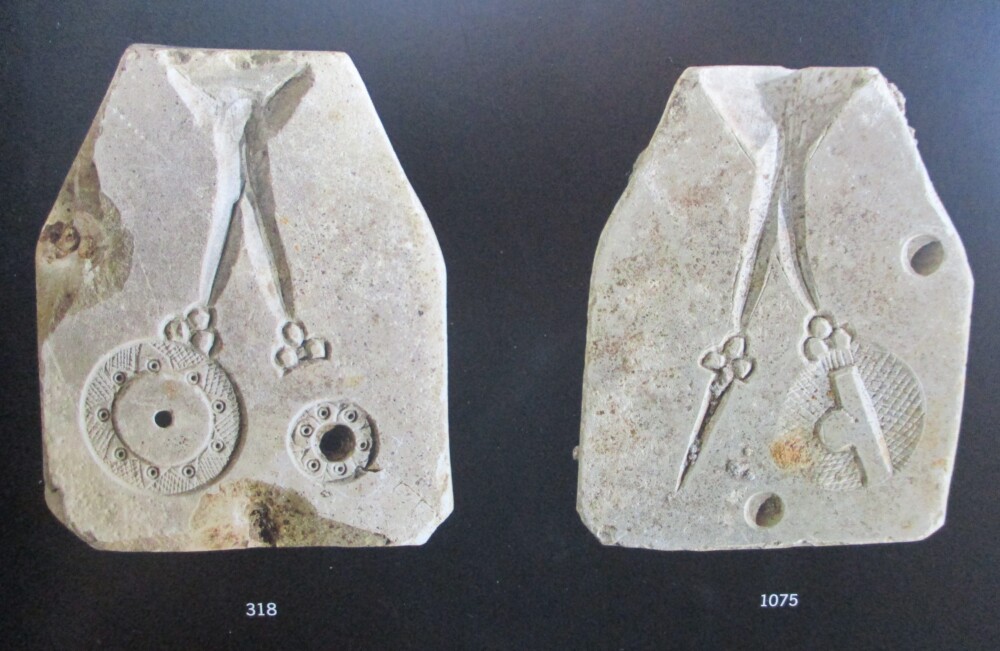
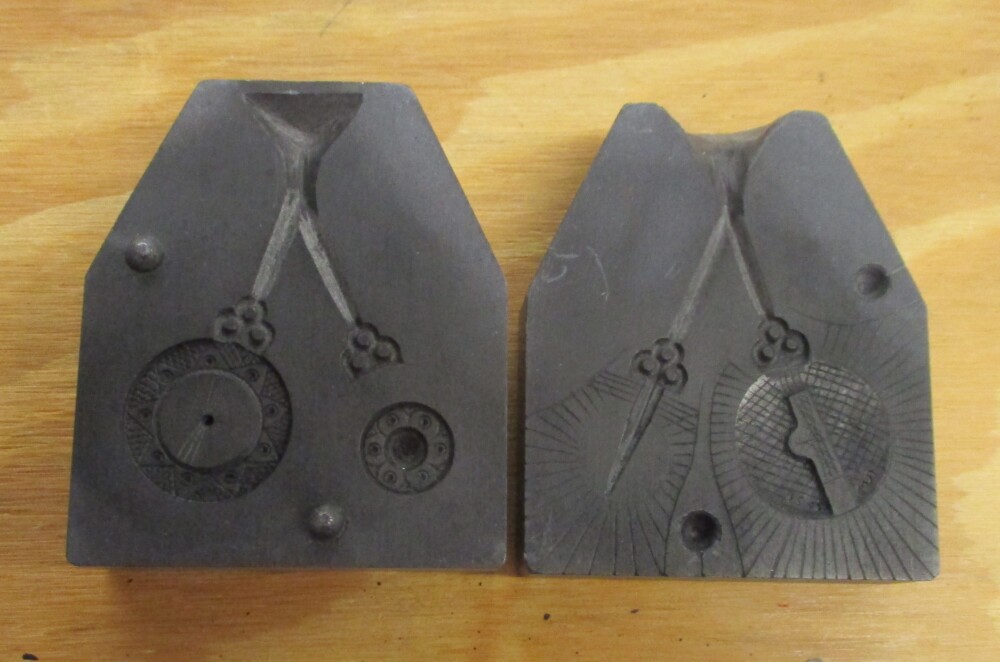
You know we just have to try something that cool – and Mac has made it work with a copy of one of the Magdeburg molds. The original (below, left) was unfortunately damaged and much of the stone that blocks the gates has broken away. Our copied mold shows what the old one looked like in its prime.

To pour the mold we set a glass stone in the bezel cavity in the lower (constrained) mold half, then level it with a wooden tool.

When the stone is level we set the other half of the mold on top. Holding the mold at an angle, we pour the pewter. Below, right, a completed casting in the mold.

In the completed casting, the stone is held in place by a bezel on the front and the extension of the stem on the back. We have made a brief video showing Mac pouring the clasp. You can view it on Youtube.

We look forward to your comments and questions!

*(Berger, Daniel. Magdeburger Gießformenfund – Herausragendes Zeugnis handwerklicher Zinngießer in einer mittelalterlichen Metropole. Halle: LADA Sachsen-Anhalt, 2020). A must-have for the serious student of medieval pewter casting.