
We make molds for a lot of medieval gewgaws – roughly 525 items. Many of the smaller goods – spangles, buttons, chaplet decorations, belt mounts, clothing fasteners – come out of multi-cavity molds that cast three or more copies of the item.
It is important that the resulting castings are indistinguishable from one another except on very close inspection. We also want the mold to cast easily and completely (or nearly completely) every time. For this to happen, the mold cavities must be very similar, and they have to be laid out so that the metal fills each of them the same way. We try to choose the best mold design from a number of authentic layouts.
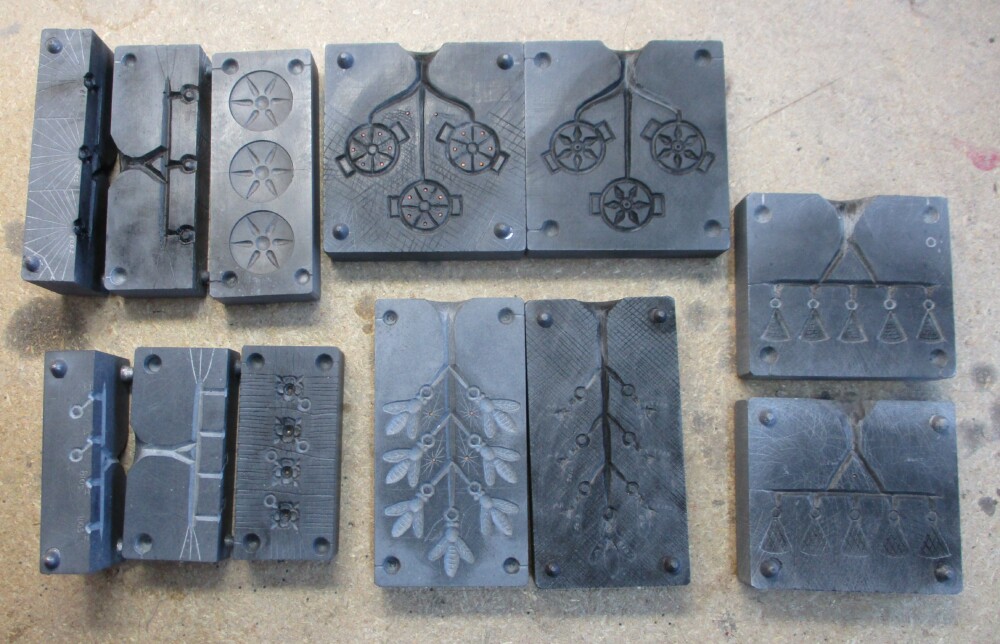
The two molds on the left are three part molds – the one to accommodate the button loop and the other so the stones can lie flat in the spangle mold while the metal pours in. The openwork star chaplet decoration mold and the bee spangle mold have cavities that branch off a central sprue. That middle sprue narrows as it descends and the lower feeds are narrower/thinner than the upper ones to balance the greater pressure to the lower parts of the mold. The mold for the triangular spangles equalizes the pressure in a different way, by arranging the cavities horizontally and splitting the main sprue to even out the flow and amount of metal to the various cavities.
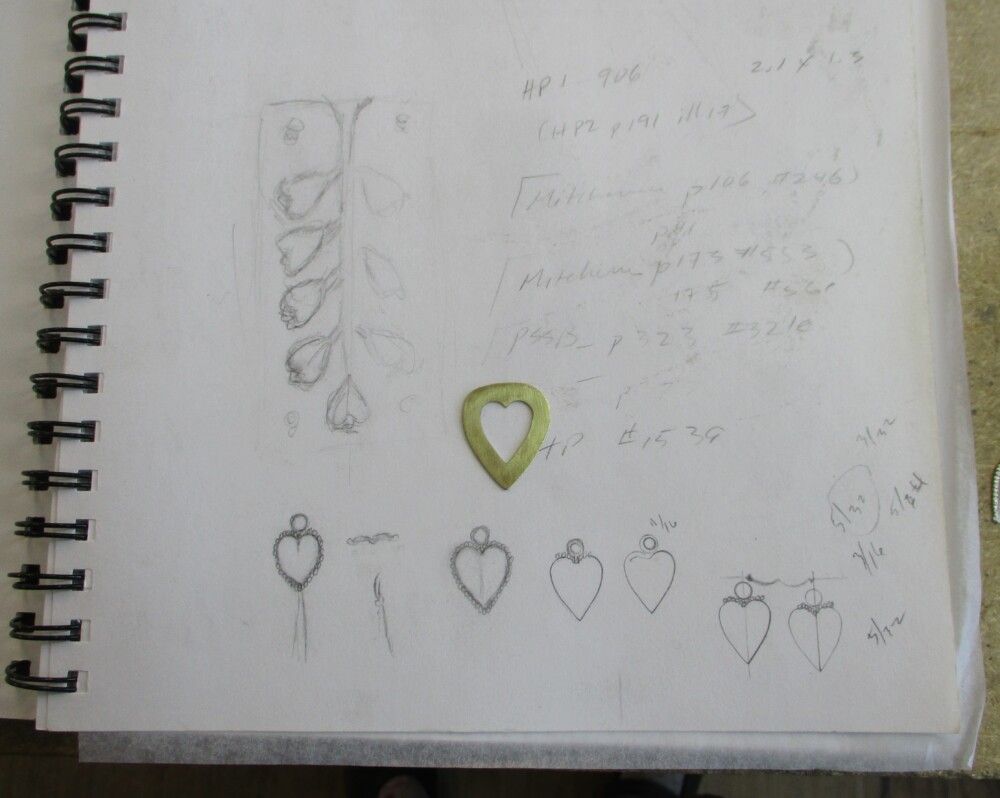
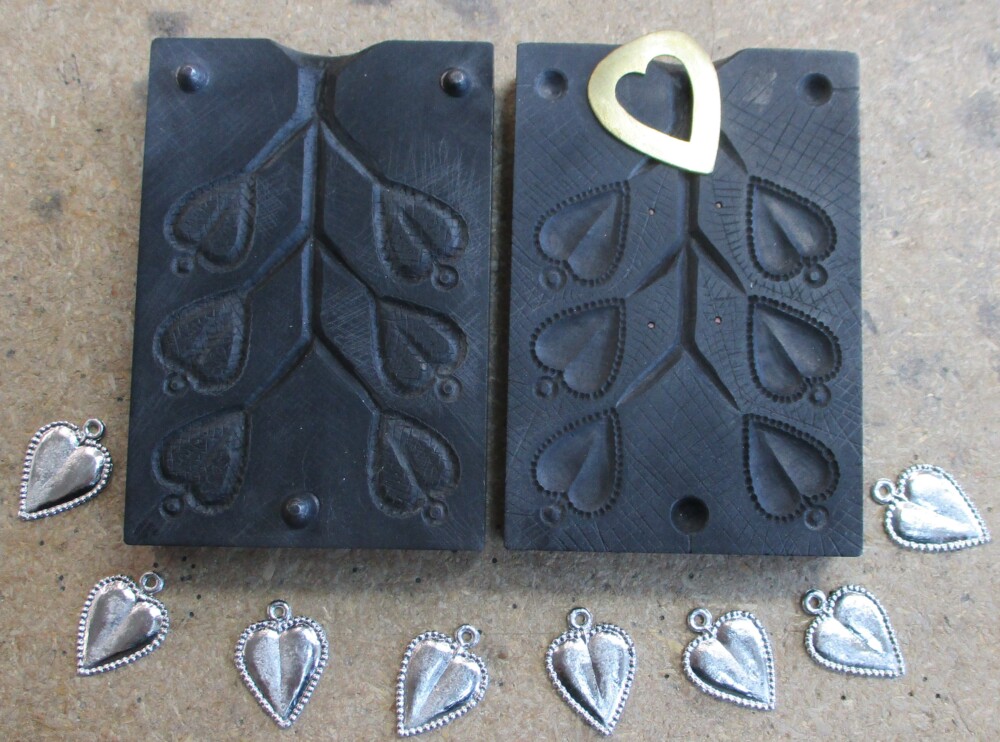
This notebook page shows a layout we considered for the heart spangles, as well as some late sketches of the form the heart would take. (Preliminary sketches were on another page.) When we make round things we use a compass to lay out the pieces. But for items like the bees or the triangles – and the hearts – we employ templates to trace the shapes of the cavities. We have used cardboard and thin template plastic before; for the heart spangle Mac made a brass template to my final design. This let me trace the exact shape with a sharp needle on the stone – and also to trace the heart in pencil in my notebook to experiment with the beading, the loop, and so on.
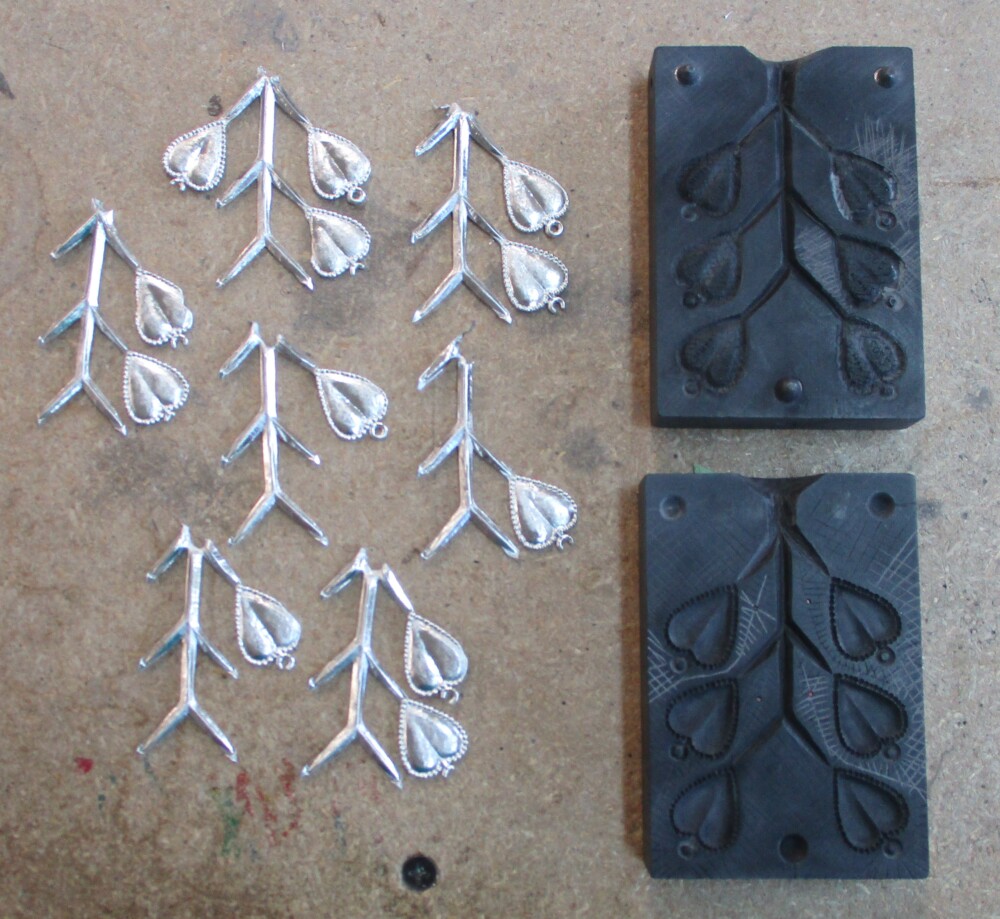
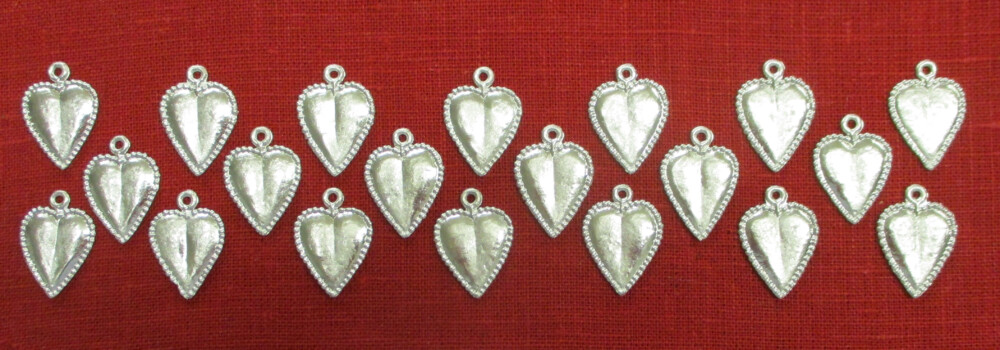
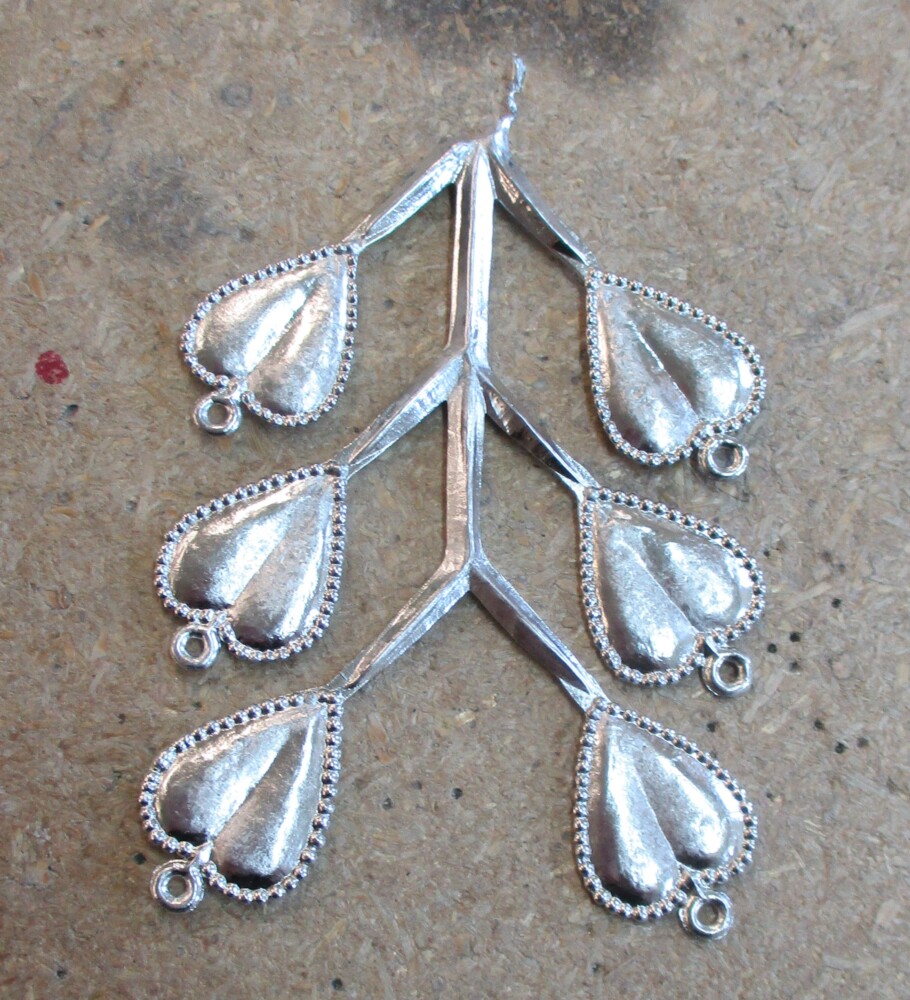
Hours of careful work into the project, I was getting many of the cavities to fill, most of the way, most of the time. I put my initials and the date on the back of each spangle, so that any examples that cast fully could be cut off, cleaned up, and sold. At this stage we keep every casting for examination. Clipping off the good examples, we lay out what is left to show where the repeating problems are. In the shot above we see that of the six cavities there is still trouble with the upper two hearts on the right. The loops are not casting, and upper heart is not filling to the edge. I corrected only the places that were not working, leaving the rest of the mold untouched. The lighter areas of the mold show where I extended and deepened the back under the beading where it was not casting, deepened the loops, and reinforced the venting both front and back.
By the time I filled the stock box, the mold still was not working perfectly every time, so the next time I cast I will continue tweaking the cavities, the sprues, and the venting. I’m almost there.
The hearts themselves are also not perfectly identical – if you took a handful of them you could play “Spot the Difference” and sort them by mold cavity. But because I took care in design and layout, and worked as meticulously as I could, they are similar enough.